 Skip to content

Building a NAS with multiple HDDs with a Raspberry Pi is a fun solution to increase data storage. It’s as easy as connecting multiple hard drives and using a Raspberry Pi as a network-attached storage solution.
With this in place, I can take all of my data and keep it in one place, accessible over the network, simplifying file management. This space-saving design makes it ideal for home or small office users who require affordable storage solutions.
What is a NAS?
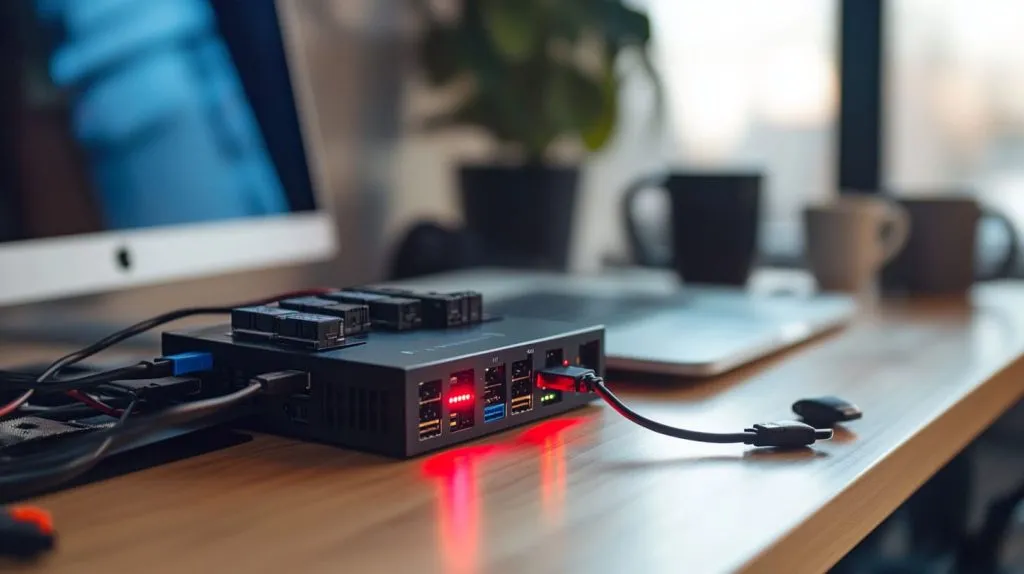
A Network Attached Storage (NAS) is almost like having your own cloud storage server sitting in your home or office. Picture it: a dedicated device solely for file storage, seamlessly connecting to your network. This configuration allows users and devices to seamlessly access shared files from anywhere.
It’s more than just backing up data, it’s about developing a centralized vault for all thing digital.
Definition of NAS
In short, NAS devices are designed to do one thing—store and retrieve your data. Unlike other computers, NAS runs without user intervention, working as a dedicated server. This means it doesn’t require a separate computer to keep track of or store files.
It handles multiple file-sharing protocols like SMB and NFS. This versatility makes it compatible with all operating systems such as Windows, macOS and Linux.
A NAS is more than a glorified storage box. It needs to be a low-power device, something that can run 24 hours a day. Ideal for busy professionals who want their files available anytime, anywhere.
For business or leisure at any hour of the day, a NAS is waiting, freshly prepared to deliver.
Benefits of Using NAS
The benefits of owning a NAS are trump several. First, it simplifies file sharing between users and devices. Say goodbye to USB drive shuffling or emailing documents to yourself.
You can download or upload files remotely through the internet, making your office wherever you want it to be. This is particularly helpful for users who are mobile or working remotely.
NAS systems are highly scalable, which means you can add more storage whenever your business requires it. You can buy an entry-level model for as little as $100 and expand your setup as you see fit.
It’s budget-friendly, keeping terabytes of data stored without emptying the wallet. This device proves to be an excellent option as a replacement for storing data directly to a PC or laptop.
It’s designed to be able to run 24/7 and handle thousands of concurrent connections. Around 70% of NAS users utilize their devices for file sharing and storage, 20% for streaming media, and 10% for other purposes like running applications or backing up data.
It’s a very convenient solution, perfect for small businesses or multi-user households that need shared access to the cloud.
Why Use Raspberry Pi for NAS?
Raspberry Pi makes a great NAS box. It’s easy on the wallet and low on power consumption, making it a cost-effective choice.
Raspberry Pi’s flexibility means it can be configured to run different software, making it as versatile as you need it to be. The community support and resources are truly unmatched, giving you unlimited access to guidance, project ideas, and support.
Raspberry Pi NAS isn’t only about the money saving. It’s all about building a personalized system that evolves with your needs.
Properly configured, it can be your media server, backup solution, and much more. It’s a little device with limitless potential.
Setting Up Raspberry Pi NAS

Creating a NAS (Network Attached Storage) with a Raspberry Pi is a fun and useful project. Plus, it’s an awesome way to put those leftover hard drives to good use!
Let's explore the essential steps to get this setup rolling smoothly:
- Step 1: Collect the necessary components
- Set up your Raspberry Pi.
- Connect several HDDs at once.
- Step 3: Install Software Packages You Need
- Setting Up Raspberry Pi NAS 1. Set network configuration. 2. Perform a test run of the NAS configuration.
1. Gather Required Materials
You’ll need some essential equipment. I chose to use a Raspberry Pi 4, as it offers just the right amount of power to serve my needs.
These can be supplemented with SATA to USB adapters to connect internal drives. A powered USB hub is key. It makes sure that the drives you connect don’t go underpowered.
Choose the right power supply. Don’t cheap out on the power supply! You’ll want a decent one for powering the Raspberry Pi and USB powered hub.
2. Prepare Raspberry Pi
After gathering your components together, let’s prepare your Raspberry Pi. I downloaded the latest version of Raspberry Pi OS with the desktop and installed it on a microSD card.
Now, it’s critical to get the system updated immediately with sudo apt update and sudo apt upgrade. By doing this, it guarantees that nothing is out-of-date.
Next, I set up SSH for remote access, which allowed me to manage the whole setup without requiring a dedicated monitor.
3. Connect Multiple HDDs
Connecting multiple HDDs involves a few steps:
- Set up the powered USB hub.
- Use SATA to USB adapters to hook up the hard drives.
- Plug the powered USB hub into one of the Raspberry Pi’s USB 3.0 ports.
- Power on the Raspberry Pi after securing all connections.
4. Install Necessary Software
With the hardware set up, it’s time to install some software, including Samba, to handle file sharing. Samba is not included with Raspbian, the Raspberry Pi OS, by default.
So, I installed it with sudo apt install samba samba-common. I had to install NTFS-3g to play nice with NTFS formatted drives.
Once again, command-line tools are your best friends here for managing and configuring drives effectively.
5. Configure Network Settings
Setting a static IP address for the Raspberry Pi is important. It makes sure you can always reach it when you need it.
By configuring Samba settings, you can define what users have access to and the permissions of those users. I did some quick tests, like pinging a network address to ensure the network was up and running.
6. Test the NAS Setup
Finally, let’s move on to testing the whole setup. Here's a checklist:
- Access the shared folders from any device using your Samba username and password.
- Verify file upload and download speeds.
- Check for any connection issues or errors.
Managing Multiple HDDs
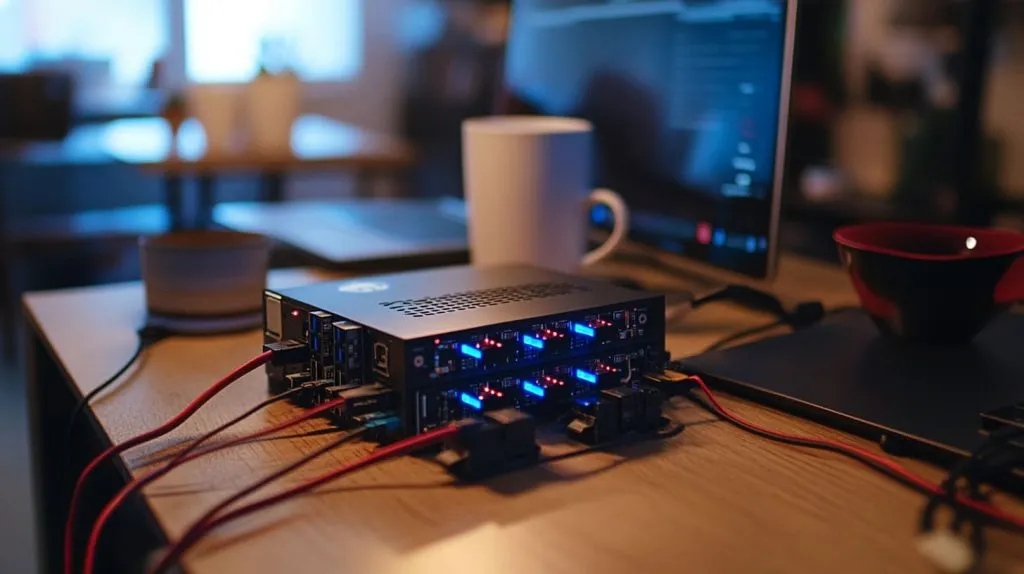
Managing your HDDs is crucial. Keeping your drives organized is important for seamless data handling. It isn’t merely a matter of where the data flows but rather how the data is stored and accessed. For instance, I have two WD My Passport 4TB HDDs that I use for backup. They are USB3 and bus-powered – so convenient.
Picture the shambles if our data isn’t stored in a coordinated fashion. It turns into a rat's nest of files, and finding one is a searcher's worst nightmare. Proper management creates a more productive environment and keeps sensitive information secure.
RAID Configurations
RAID, or Redundant Array of Independent Disks, is central to this configuration. It enhances both redundancy and performance. RAID 0 strips data across multiple disks, increasing speed without any redundancy. In contrast, RAID 1 is a mirroring configuration, so if one drive crashes, your data is preserved on the second one.
These settings are extremely important. For example, I use rsync to sync data between my two drives every night. Then if the first drive fails, my data is still safe on the second drive. With mdadm, a Linux utility, I’m able to create and maintain these software-based RAID arrays. It’s kind of like putting together a Lego set, one block at a time, each piece locking into place to form a strong foundation.
Partitioning and Formatting Drives
Partitioning is yet another level of organization. Utilities such as fdisk allow you to cut up the drive into usable pieces. Imagine cutting a pizza into slices where each slice is clearly marked. I prefer EXT4 for formatting; it’s a common default, especially in Linux environments. It’s robust and simple.
Labeling these partitions is important. Similar to labeling jars in your kitchen pantry, it allows you to find data quickly. Without some kind of label, you’re guaranteed a data pantry nightmare.
Mounting Drives Properly
Mounting your drives is easy enough. Here's a bullet list to guide you:
- Identify connected drives. Perhaps the simplest way to do this is with terminal commands such as
lsblkorfdisk -l. - Create mount points for each drive with
mkdir /mnt/mydrive. - Use the
mountcommand to attach drives:sudo mount /dev/sdx1 /mnt/mydrive. - Edit
/etc/fstabto mount them automatically on boot. This makes sure your drives are always ready when you turn on your system.
Pair this with my setup, and I’ve experienced the dreaded clicking from the primary drive. In general, clicking is a very bad omen. Routine checks on driver health are important, too. It’s similar to a routine health check-up.
The Pi4, which is what I use, can provide 1.2A to a single USB3 port. This is important since external drives pull maximum inrush current at spin-up. Staying vigilant on these fronts can certainly prevent data catastrophes.
Configuration Options for Raspberry Pi NAS

Once you start configuring a Raspberry Pi NAS (Network Attached Storage), the possibilities are endless. You can pretty easily hack it up to do what you want it to do. With as many HDDs as you can get your hands on, the sky is the limit.
If you plan on using your NAS as a media server, be sure to set it up accordingly. If you want the best experience, optimize for high read speeds. If your main use case involves sensitive work documents, for example, then security and effective backup provisions should be the priority. It’s a matter of matching the configuration to your priorities.
Tweaking networking configuration is one of the most important steps to NAS success. Connect the Raspberry Pi to your network using an Ethernet cable. This one little move will make a world of difference when it comes to your data transfer speeds.
Setting up QoS on your router and network settings to prioritize NAS traffic can vastly improve performance. This guarantees a much better experience, particularly when you have many users hitting the system.
This is the other cornerstone of a reliable NAS. Safeguarding data availability and ensuring data fidelity are essential. Taking steps such as using encrypted connections and keeping your login credentials safe can help protect your files from prying eyes.
Keeping the Raspberry Pi OS updated is important to patch any discovered vulnerabilities. Additionally, be sure to keep any NAS software up-to-date with available security patches.
Optimize System Performance
Selecting the optimal file system is key to overall system performance. If your NAS is mainly going to be used as a media server serving large media files, stick with file systems such as EXT4 or XFS. They are great for working with big files.
Monitoring available system resources is a critical piece, too. Tools such as Htop are valuable in quickly diagnosing CPU, memory, or disk utilization bottlenecks. By implementing caching strategies you can greatly improve read and write speeds.
For instance, using tmpfs storage for temporary files makes your NAS much more responsive.
Secure Data Access
When it comes to securely sharing files, Samba is your best friend. It’s compatible with just about every other system on your network, which makes it the easy default pick. With proper user account and permission configuration within Samba, administrators can rest assured that only authorized users have access to sensitive files.
While Samba can work without a password, for security, we recommend using one. Enabling firewall settings on your Raspberry Pi will help keep your NAS insulated from unwanted access.
If you want to avoid a potentially catastrophic data loss, regular backups are key. They ensure that your files are protected, even in the event of a complete hardware failure.
Automate Backup Processes
Automating your backups allows you to save time and guarantee consistency. Here is a simple list of strategies to consider:
- Use
rsyncor similar for efficient incremental backups, which only copy changes you’ve made since the last backup. - Use cron jobs to schedule your backups at regular intervals so that they occur without you having to lift a finger.
- Keep backups on different physical drives or external storage to protect from hardware failure.
Best Practices for Raspberry Pi NAS
Tip #5 A well-thought-out folder structure goes a long way. This configuration makes finding files a snap, keeping a lot of clutter at bay. Consider it the digital equivalent of the perfectly organized toolbox. You just need to know where everything is, and it saves time.
I keep a simple hierarchy: folders for music, photos, and documents. It saves you a lot of headaches down the road.
To ensure your Raspberry Pi NAS performs at its best, updating it regularly is essential. Updating the Raspberry Pi OS and installing packages should be treated like changing the oil in your car. It makes sure that everything is operating at optimum performance.
In particular, security fixes are critical. They protect your NAS from potential exploits. I created calendar reminders to ping me each month to look for updates. It helps me stay more secure overall, making sure that I’m always running the most up-to-date system.
Regular System Updates
Keeping up with updates and applying them in a timely fashion is essential. A well-cared-for system is not only more efficient. It isn’t all about performance, either. Security is a huge concern.
As with any machine, staying on top of security patches is key to keeping your data secure. I suggest putting on reminders to do some regular upkeep. I know that sounds like a drag, but believe me, it’s a simple step that pays huge dividends.
Monitor System Health
Keeping track of your Raspberry Pi’s health is similar to watching your car’s dashboard indicators. Tools such as htop or glances are excellent for monitoring CPU and memory usage. Being aware of the current state of your system’s performance will keep you from being caught off guard.
Monitor your drive health with SMART monitoring tools like smartmontools. It’s akin to a medical check-up for your hard drives. Logging system events assists in troubleshooting. If/when something does go wrong, you at least have a documentation trail to fall back on.
Manage Storage Efficiently
Smart use of storage is very important. Clearing out files that are no longer needed will help recover lost space over time. I routinely check and clear out anything that I don’t need.
Setting quotas for users stops users from going overboard on storage. It guarantees equal use to all. Treat cloud storage as an extension of your local storage. It offers additional storage and can be used as a backup, too.
Raspbian is a great Linux distribution if you are brand new to Linux. It’s powerful, versatile, and easy to use. Great for sharing files across your network.
Unlike most computers, a NAS is meant to run 24/7, around the clock. It’s low-power, which is perfect for sharing files around the clock. When selecting drives, keep in mind that external USB drives will pull maximum current at spin-up.
Watch for power needs. When working with small boards, it’s easy to overlook power needs. The Raspberry Pi 4 can provide up to 1.2A to a single USB3 port if you only use one. So keep this consideration in mind when choosing a drive.
For file sharing, Samba would be the best practice option. It’s a free, open-source replacement for Windows’ SMB/CIFS protocol. Formatting a drive will take time, especially if it’s the first time you are using the drive, so be patient.
Make sure you give yourself write permissions to the drive with sudo chown -R pi /media/pi/MyExternalDrive.
Troubleshooting Common Issues
Setting up your own NAS using a Raspberry Pi and a few HDDs is a fun and useful project. You will likely face some roadblocks in the process. From connectivity issues to failure to recognize a driving pattern, every phase of the process comes with its own challenges. Knowing these common issues and having a plan to address them is essential.
Join us as we take a closer look at the top issues and how you can best troubleshoot them.
Connectivity Problems
Getting your Raspberry Pi NAS properly connected to your network usually requires starting with the fundamentals. Check the physical connections: inspect the network cables and ensure everything is securely plugged in. If you’re troubleshooting, a loose cable is the easiest and most often forgotten culprit.
Third, we recommend checking network configurations. Ensure that your Raspberry Pi is using the proper IP configuration. If you configured your Pi to a static IP, ensure it’s within the range of your network. Just be sure that it doesn’t interfere with other devices.
Often, just restarting the Raspberry Pi and your network devices can resolve any connectivity problems. This clears the network state and may fix any temporary network-related hiccups. Trust me—I’ve experienced plenty of network misfortunes, and a reboot is usually the cure.
Drive Recognition Failures
If your hard drives are missing, in case hard drives are not detected, check the USB connection and power supply first. Check the power supply on the drives, particularly if using a USB hub. Power problems are pretty high on the list of suspects for drives not showing up.
Running terminal commands such as lsusb or fdisk -l will help verify if the drives are being detected. If it is still not working, attempt reformatting the drives. Related, I once got a “Device or resource busy” error when trying to format four HDDs at once.
The fix was simply going to run umount to free the resources associated with the drive. We found that this same technique worked for SSDs as well, just with a different device showing up as busy each time.
Performance Bottlenecks
When your NAS is slow, check the power supply first. A lack of enough power can seriously hamper performance. Upgrading to faster hard drives or solid-state drives is another solution to improve performance. SATA drives have much better random IO performance than USB 3.0.
This makes them a much better fit for things like serving disk images or distributing small files. Click to learn how Optimizing network settings can further improve performance.
Network packet queueing issues when I connect a RAID array I take it for granted that these issues are demonstrable limitations of the Pi’s SoC. Hardware RAID controllers can help to mitigate this by taking the load off of the CPU, providing a processing performance increase to applications.
Conclusion
Building a NAS with multiple HDDs with a Raspberry Pi is a fun solution to increase data storage. It’s as easy as connecting multiple hard drives and using a Raspberry Pi as a network-attached storage solution.
With this in place, I can take all of my data and keep it in one place, accessible over the network, simplifying file management. This space-saving design makes it ideal for home or small office users who require affordable storage solutions.
What is a NAS?
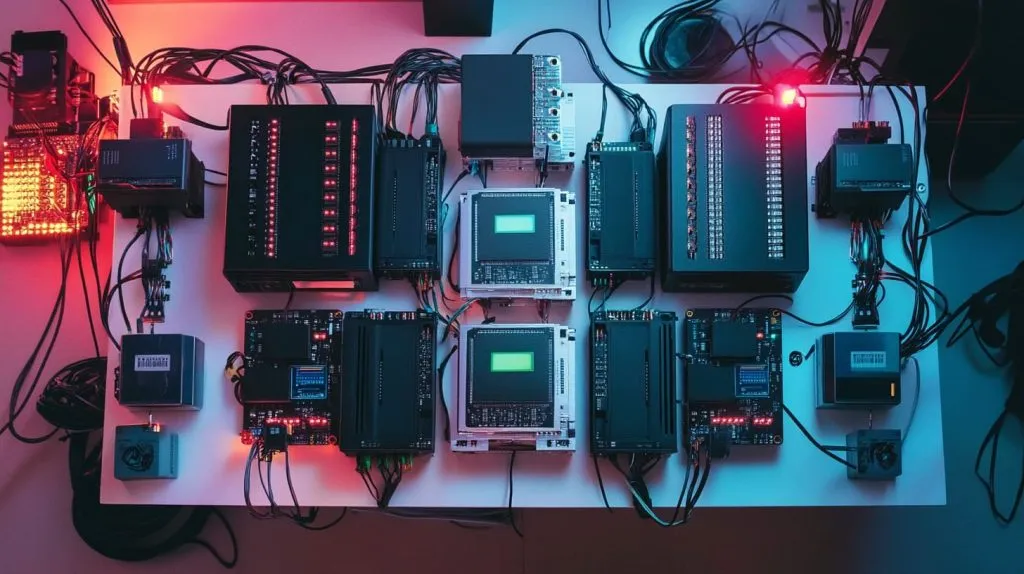
A Network Attached Storage (NAS) is almost like having your own cloud storage server sitting in your home or office. Picture it: a dedicated device solely for file storage, seamlessly connecting to your network. This configuration allows users and devices to seamlessly access shared files from anywhere.
It’s more than just backing up data, it’s about developing a centralized vault for all thing digital.
Definition of NAS
In short, NAS devices are designed to do one thing—store and retrieve your data. Unlike other computers, NAS runs without user intervention, working as a dedicated server. This means it doesn’t require a separate computer to keep track of or store files.
It handles multiple file-sharing protocols like SMB and NFS. This versatility makes it compatible with all operating systems such as Windows, macOS and Linux.
A NAS is more than a glorified storage box. It needs to be a low-power device, something that can run 24 hours a day. Ideal for busy professionals who want their files available anytime, anywhere.
For business or leisure at any hour of the day, a NAS is waiting, freshly prepared to deliver.
Benefits of Using NAS
The benefits of owning a NAS are trump several. First, it simplifies file sharing between users and devices. Say goodbye to USB drive shuffling or emailing documents to yourself.
You can download or upload files remotely through the internet, making your office wherever you want it to be. This is particularly helpful for users who are mobile or working remotely.
NAS systems are highly scalable, which means you can add more storage whenever your business requires it. You can buy an entry-level model for as little as $100 and expand your setup as you see fit.
It’s budget-friendly, keeping terabytes of data stored without emptying the wallet. This device proves to be an excellent option as a replacement for storing data directly to a PC or laptop.
It’s designed to be able to run 24/7 and handle thousands of concurrent connections. Around 70% of NAS users utilize their devices for file sharing and storage, 20% for streaming media, and 10% for other purposes like running applications or backing up data.
It’s a very convenient solution, perfect for small businesses or multi-user households that need shared access to the cloud.
Why Use Raspberry Pi for NAS?
Raspberry Pi makes a great NAS box. It’s easy on the wallet and low on power consumption, making it a cost-effective choice.
Raspberry Pi’s flexibility means it can be configured to run different software, making it as versatile as you need it to be. The community support and resources are truly unmatched, giving you unlimited access to guidance, project ideas, and support.
Raspberry Pi NAS isn’t only about the money saving. It’s all about building a personalized system that evolves with your needs.
Properly configured, it can be your media server, backup solution, and much more. It’s a little device with limitless potential.
Setting Up Raspberry Pi NAS
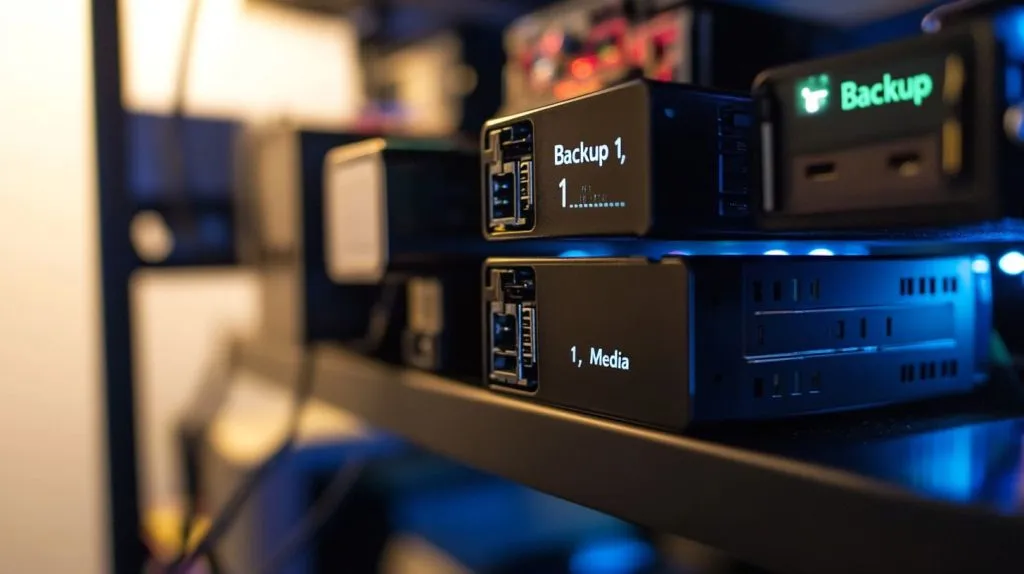
Creating a NAS (Network Attached Storage) with a Raspberry Pi is a fun and useful project. Plus, it’s an awesome way to put those leftover hard drives to good use!
Let's explore the essential steps to get this setup rolling smoothly:
- Step 1: Collect the necessary components
- Set up your Raspberry Pi.
- Connect several HDDs at once.
- Step 3: Install Software Packages You Need
- Setting Up Raspberry Pi NAS 1. Set network configuration. 2. Perform a test run of the NAS configuration.
1. Gather Required Materials
You’ll need some essential equipment. I chose to use a Raspberry Pi 4, as it offers just the right amount of power to serve my needs.
These can be supplemented with SATA to USB adapters to connect internal drives. A powered USB hub is key. It makes sure that the drives you connect don’t go underpowered.
Choose the right power supply. Don’t cheap out on the power supply! You’ll want a decent one for powering the Raspberry Pi and USB powered hub.
2. Prepare Raspberry Pi
After gathering your components together, let’s prepare your Raspberry Pi. I downloaded the latest version of Raspberry Pi OS with the desktop and installed it on a microSD card.
Now, it’s critical to get the system updated immediately with sudo apt update and sudo apt upgrade. By doing this, it guarantees that nothing is out-of-date.
Next, I set up SSH for remote access, which allowed me to manage the whole setup without requiring a dedicated monitor.
3. Connect Multiple HDDs
Connecting multiple HDDs involves a few steps:
- Set up the powered USB hub.
- Use SATA to USB adapters to hook up the hard drives.
- Plug the powered USB hub into one of the Raspberry Pi’s USB 3.0 ports.
- Power on the Raspberry Pi after securing all connections.
4. Install Necessary Software
With the hardware set up, it’s time to install some software, including Samba, to handle file sharing. Samba is not included with Raspbian, the Raspberry Pi OS, by default.
So, I installed it with sudo apt install samba samba-common. I had to install NTFS-3g to play nice with NTFS formatted drives.
Once again, command-line tools are your best friends here for managing and configuring drives effectively.
5. Configure Network Settings
Setting a static IP address for the Raspberry Pi is important. It makes sure you can always reach it when you need it.
By configuring Samba settings, you can define what users have access to and the permissions of those users. I did some quick tests, like pinging a network address to ensure the network was up and running.
6. Test the NAS Setup
Finally, let’s move on to testing the whole setup. Here's a checklist:
- Access the shared folders from any device using your Samba username and password.
- Verify file upload and download speeds.
- Check for any connection issues or errors.
Managing Multiple HDDs

Managing your HDDs is crucial. Keeping your drives organized is important for seamless data handling. It isn’t merely a matter of where the data flows but rather how the data is stored and accessed. For instance, I have two WD My Passport 4TB HDDs that I use for backup. They are USB3 and bus-powered – so convenient.
Picture the shambles if our data isn’t stored in a coordinated fashion. It turns into a rat's nest of files, and finding one is a searcher's worst nightmare. Proper management creates a more productive environment and keeps sensitive information secure.
RAID Configurations
RAID, or Redundant Array of Independent Disks, is central to this configuration. It enhances both redundancy and performance. RAID 0 strips data across multiple disks, increasing speed without any redundancy. In contrast, RAID 1 is a mirroring configuration, so if one drive crashes, your data is preserved on the second one.
These settings are extremely important. For example, I use rsync to sync data between my two drives every night. Then if the first drive fails, my data is still safe on the second drive. With mdadm, a Linux utility, I’m able to create and maintain these software-based RAID arrays. It’s kind of like putting together a Lego set, one block at a time, each piece locking into place to form a strong foundation.
Partitioning and Formatting Drives
Partitioning is yet another level of organization. Utilities such as fdisk allow you to cut up the drive into usable pieces. Imagine cutting a pizza into slices where each slice is clearly marked. I prefer EXT4 for formatting; it’s a common default, especially in Linux environments. It’s robust and simple.
Labeling these partitions is important. Similar to labeling jars in your kitchen pantry, it allows you to find data quickly. Without some kind of label, you’re guaranteed a data pantry nightmare.
Mounting Drives Properly
Mounting your drives is easy enough. Here's a bullet list to guide you:
- Identify connected drives. Perhaps the simplest way to do this is with terminal commands such as
lsblkorfdisk -l. - Create mount points for each drive with
mkdir /mnt/mydrive. - Use the
mountcommand to attach drives:sudo mount /dev/sdx1 /mnt/mydrive. - Edit
/etc/fstabto mount them automatically on boot. This makes sure your drives are always ready when you turn on your system.
Pair this with my setup, and I’ve experienced the dreaded clicking from the primary drive. In general, clicking is a very bad omen. Routine checks on driver health are important, too. It’s similar to a routine health check-up.
The Pi4, which is what I use, can provide 1.2A to a single USB3 port. This is important since external drives pull maximum inrush current at spin-up. Staying vigilant on these fronts can certainly prevent data catastrophes.
Configuration Options for Raspberry Pi NAS

Once you start configuring a Raspberry Pi NAS (Network Attached Storage), the possibilities are endless. You can pretty easily hack it up to do what you want it to do. With as many HDDs as you can get your hands on, the sky is the limit.
If you plan on using your NAS as a media server, be sure to set it up accordingly. If you want the best experience, optimize for high read speeds. If your main use case involves sensitive work documents, for example, then security and effective backup provisions should be the priority. It’s a matter of matching the configuration to your priorities.
Tweaking networking configuration is one of the most important steps to NAS success. Connect the Raspberry Pi to your network using an Ethernet cable. This one little move will make a world of difference when it comes to your data transfer speeds.
Setting up QoS on your router and network settings to prioritize NAS traffic can vastly improve performance. This guarantees a much better experience, particularly when you have many users hitting the system.
This is the other cornerstone of a reliable NAS. Safeguarding data availability and ensuring data fidelity are essential. Taking steps such as using encrypted connections and keeping your login credentials safe can help protect your files from prying eyes.
Keeping the Raspberry Pi OS updated is important to patch any discovered vulnerabilities. Additionally, be sure to keep any NAS software up-to-date with available security patches.
Optimize System Performance
Selecting the optimal file system is key to overall system performance. If your NAS is mainly going to be used as a media server serving large media files, stick with file systems such as EXT4 or XFS. They are great for working with big files.
Monitoring available system resources is a critical piece, too. Tools such as Htop are valuable in quickly diagnosing CPU, memory, or disk utilization bottlenecks. By implementing caching strategies you can greatly improve read and write speeds.
For instance, using tmpfs storage for temporary files makes your NAS much more responsive.
Secure Data Access
When it comes to securely sharing files, Samba is your best friend. It’s compatible with just about every other system on your network, which makes it the easy default pick. With proper user account and permission configuration within Samba, administrators can rest assured that only authorized users have access to sensitive files.
While Samba can work without a password, for security, we recommend using one. Enabling firewall settings on your Raspberry Pi will help keep your NAS insulated from unwanted access.
If you want to avoid a potentially catastrophic data loss, regular backups are key. They ensure that your files are protected, even in the event of a complete hardware failure.
Automate Backup Processes
Automating your backups allows you to save time and guarantee consistency. Here is a simple list of strategies to consider:
- Use
rsyncor similar for efficient incremental backups, which only copy changes you’ve made since the last backup. - Use cron jobs to schedule your backups at regular intervals so that they occur without you having to lift a finger.
- Keep backups on different physical drives or external storage to protect from hardware failure.
Best Practices for Raspberry Pi NAS

Tip #5 A well-thought-out folder structure goes a long way. This configuration makes finding files a snap, keeping a lot of clutter at bay. Consider it the digital equivalent of the perfectly organized toolbox. You just need to know where everything is, and it saves time.
I keep a simple hierarchy: folders for music, photos, and documents. It saves you a lot of headaches down the road.
To ensure your Raspberry Pi NAS performs at its best, updating it regularly is essential. Updating the Raspberry Pi OS and installing packages should be treated like changing the oil in your car. It makes sure that everything is operating at optimum performance.
In particular, security fixes are critical. They protect your NAS from potential exploits. I created calendar reminders to ping me each month to look for updates. It helps me stay more secure overall, making sure that I’m always running the most up-to-date system.
Regular System Updates
Keeping up with updates and applying them in a timely fashion is essential. A well-cared-for system is not only more efficient. It isn’t all about performance, either. Security is a huge concern.
As with any machine, staying on top of security patches is key to keeping your data secure. I suggest putting on reminders to do some regular upkeep. I know that sounds like a drag, but believe me, it’s a simple step that pays huge dividends.
Monitor System Health
Keeping track of your Raspberry Pi’s health is similar to watching your car’s dashboard indicators. Tools such as htop or glances are excellent for monitoring CPU and memory usage. Being aware of the current state of your system’s performance will keep you from being caught off guard.
Monitor your drive health with SMART monitoring tools like smartmontools. It’s akin to a medical check-up for your hard drives. Logging system events assists in troubleshooting. If/when something does go wrong, you at least have a documentation trail to fall back on.
Manage Storage Efficiently
Smart use of storage is very important. Clearing out files that are no longer needed will help recover lost space over time. I routinely check and clear out anything that I don’t need.
Setting quotas for users stops users from going overboard on storage. It guarantees equal use to all. Treat cloud storage as an extension of your local storage. It offers additional storage and can be used as a backup, too.
Raspbian is a great Linux distribution if you are brand new to Linux. It’s powerful, versatile, and easy to use. Great for sharing files across your network.
Unlike most computers, a NAS is meant to run 24/7, around the clock. It’s low-power, which is perfect for sharing files around the clock. When selecting drives, keep in mind that external USB drives will pull maximum current at spin-up.
Watch for power needs. When working with small boards, it’s easy to overlook power needs. The Raspberry Pi 4 can provide up to 1.2A to a single USB3 port if you only use one. So keep this consideration in mind when choosing a drive.
For file sharing, Samba would be the best practice option. It’s a free, open-source replacement for Windows’ SMB/CIFS protocol. Formatting a drive will take time, especially if it’s the first time you are using the drive, so be patient.
Make sure you give yourself write permissions to the drive with sudo chown -R pi /media/pi/MyExternalDrive.
Troubleshooting Common Issues

Setting up your own NAS using a Raspberry Pi and a few HDDs is a fun and useful project. You will likely face some roadblocks in the process. From connectivity issues to failure to recognize a driving pattern, every phase of the process comes with its own challenges. Knowing these common issues and having a plan to address them is essential.
Join us as we take a closer look at the top issues and how you can best troubleshoot them.
Connectivity Problems
Getting your Raspberry Pi NAS properly connected to your network usually requires starting with the fundamentals. Check the physical connections: inspect the network cables and ensure everything is securely plugged in. If you’re troubleshooting, a loose cable is the easiest and most often forgotten culprit.
Third, we recommend checking network configurations. Ensure that your Raspberry Pi is using the proper IP configuration. If you configured your Pi to a static IP, ensure it’s within the range of your network. Just be sure that it doesn’t interfere with other devices.
Often, just restarting the Raspberry Pi and your network devices can resolve any connectivity problems. This clears the network state and may fix any temporary network-related hiccups. Trust me—I’ve experienced plenty of network misfortunes, and a reboot is usually the cure.
Drive Recognition Failures
If your hard drives are missing, in case hard drives are not detected, check the USB connection and power supply first. Check the power supply on the drives, particularly if using a USB hub. Power problems are pretty high on the list of suspects for drives not showing up.
Running terminal commands such as lsusb or fdisk -l will help verify if the drives are being detected. If it is still not working, attempt reformatting the drives. Related, I once got a “Device or resource busy” error when trying to format four HDDs at once.
The fix was simply going to run umount to free the resources associated with the drive. We found that this same technique worked for SSDs as well, just with a different device showing up as busy each time.
Performance Bottlenecks
When your NAS is slow, check the power supply first. A lack of enough power can seriously hamper performance. Upgrading to faster hard drives or solid-state drives is another solution to improve performance. SATA drives have much better random IO performance than USB 3.0.
This makes them a much better fit for things like serving disk images or distributing small files. Click to learn how Optimizing network settings can further improve performance.
Network packet queueing issues when I connect a RAID array I take it for granted that these issues are demonstrable limitations of the Pi’s SoC. Hardware RAID controllers can help to mitigate this by taking the load off of the CPU, providing a processing performance increase to applications.
Conclusion
Building a NAS with Raspberry Pi and multiple HDDs offers plenty of options. You end up with a very powerful setup tailored to your storage needs, all while saving money. I’ve witnessed how this type of project unites the technology community, inspiring a sense of creativity and innovation among makers and doers.
When paired with proper configuration, you unlock powerful storage solutions. You learn how to properly utilize HDDs. You become a master at troubleshooting every conceivable issue. It’s more than technology and storage; it’s about giving kids the opportunity to learn and grow in the technology space.
Whether you intend to use this project or not, I hope you’ll give it a shot. So get started, see what you can create, and let us know how it goes! Your story is the spark that ignites everyone’s activism. Join us as we continue the discussion on Raspberry Pi and its infinite possibilities.
Frequently Asked Questions
What is a NAS?
What is a NAS (Network Attached Storage)? This lets multiple users and devices access data over a network simultaneously. What is a NAS? NAS offers a single, centralized location to store and share data files.
Can I use a Raspberry Pi for a NAS?
So, can you make a NAS with a Raspberry Pi? It’s affordable and low-power. With a little ingenuity, it can handle multiple HDDs for a DIY NAS experience.
How do I manage multiple HDDs on a Raspberry Pi NAS?
A powered USB hub will be necessary to connect multiple HDDs. Make sure the hub you use can supply sufficient power. Utilize software such as OpenMediaVault to configure and manage your RAID array.
What are the best practices for setting up a Raspberry Pi NAS?
Use proper cooling to reduce the risk of overheating. Keep software up to date for security. Regularly install available security updates. Always use a stable power supply and back up data often.
What should I do if my Raspberry Pi NAS isn't accessible?
Network connections are the first thing to check. Make sure the Raspberry Pi and the devices you want to connect with are on the same network. Be sure to restart both the NAS and the router. Check software settings and access rights.
Is it possible to configure different RAID levels on Raspberry Pi NAS?
You can set up various RAID levels (RAID 0, 1, 5) through software like OpenMediaVault. Select according to your data redundancy and performance requirements.
Are there any limitations to using Raspberry Pi as a NAS?
Raspberry Pi lacks the processing power of dedicated NAS devices. It might not hold up under heavy loads or massive file transfers.
Building a NAS with Raspberry Pi and multiple HDDs offers plenty of options. You end up with a very powerful setup tailored to your storage needs, all while saving money. I’ve witnessed how this type of project unites the technology community, inspiring a sense of creativity and innovation among makers and doers.
When paired with proper configuration, you unlock powerful storage solutions. You learn how to properly utilize HDDs. You become a master at troubleshooting every conceivable issue. It’s more than technology and storage; it’s about giving kids the opportunity to learn and grow in the technology space.
Whether you intend to use this project or not, I hope you’ll give it a shot. So get started, see what you can create, and let us know how it goes! Your story is the spark that ignites everyone’s activism. Join us as we continue the discussion on Raspberry Pi and its infinite possibilities.
Frequently Asked Questions
What is a NAS?
What is a NAS (Network Attached Storage)? This lets multiple users and devices access data over a network simultaneously. What is a NAS? NAS offers a single, centralized location to store and share data files.
Can I use a Raspberry Pi for a NAS?
So, can you make a NAS with a Raspberry Pi? It’s affordable and low-power. With a little ingenuity, it can handle multiple HDDs for a DIY NAS experience.
How do I manage multiple HDDs on a Raspberry Pi NAS?
A powered USB hub will be necessary to connect multiple HDDs. Make sure the hub you use can supply sufficient power. Utilize software such as OpenMediaVault to configure and manage your RAID array.
What are the best practices for setting up a Raspberry Pi NAS?
Use proper cooling to reduce the risk of overheating. Keep software up to date for security. Regularly install available security updates. Always use a stable power supply and back up data often.
What should I do if my Raspberry Pi NAS isn't accessible?
Network connections are the first thing to check. Make sure the Raspberry Pi and the devices you want to connect with are on the same network. Be sure to restart both the NAS and the router. Check software settings and access rights.
Is it possible to configure different RAID levels on Raspberry Pi NAS?
You can set up various RAID levels (RAID 0, 1, 5) through software like OpenMediaVault. Select according to your data redundancy and performance requirements.
Are there any limitations to using Raspberry Pi as a NAS?
Raspberry Pi lacks the processing power of dedicated NAS devices. It might not hold up under heavy loads or massive file transfers.







Leave A Comment