 Skip to content


Key Takeaways
This means learning the radio interfaces and GPIO pin functions to realize the ultimate communication and integration.
It’s important to have unique node numbers as there are a lot of nodes in the GMRS network. Their work makes sure communication channels are maintained and organized, increasing user access and connectivity.
Essential hardware for the setup includes a compatible Raspberry Pi model, power supplies, and necessary radio interfaces, ensuring all components are properly connected for seamless operation.
There’s a lot of software to install and configure. There are some files that you need to download, install on the Raspberry Pi, and configure network settings such as port forwarding and static IP addresses.
However, testing and troubleshooting are extremely important. They also provide verification that the software is properly installed and working properly, giving you solid communication across the GMRS network.
Transitioning to ASL3 Beta offers improved features and user experience, with a need for careful planning and backing up existing configurations to address potential challenges during the upgrade.
You might not know it, but Raspberry Pi is the perfect platform to power your GMRS hub node. Setting it up is surprisingly simple and rewarding.
Next, we’ll take you step by step through how to get a new node number; this is important to access the network.
Get a closer look at the software downloads and configurations required to perform GMRS hub client operations. This guide marries technical know-how and step-by-step clarity to ensure that the setup process is as easy as possible.
Set yourself up to expand your comms capabilities without all the fuss.
Understanding GMRS Hub Nodes
What is a GMRS Hub Node
A GMRS hub node is a central element that can enhance radio communication systems, especially for individuals and communities. These nodes help enable seamless communication by interconnecting GMRS radios and GMRS repeaters.
The basics A GMRS hub node consists of a few essential elements. These consist of a Raspberry Pi, a radio, and either a Radio Interface Module (RIM) or a Universal Radio Interface (URI).
Raspberry Pi The Raspberry Pi can be the version 2, 3, or 4 and is the central processing unit for the hub node. In the background, the linked radio – like, for example, a Motorola CDM series two-way radio – handles the actual transmission and reception of signals. The RIM or URI also helps link these devices together, making sure data can flow seamlessly between them.
To get started with establishing a GMRS hub node, download a New England GMRS image file. Second, get a unique GMRS Hub Node number. This arrangement provides for a more flexible network where communications received on one radio can be transmitted to all connected radios.
The RIM-Maxtrac combo works great for a one radio hub node. On the other hand, the RIM-Maxtrac-RM is meant to be used with repeaters which use separate transmitters and receivers. GMRS hub nodes really make GMRS unique compared to other radio systems. They provide a more user-friendly and practical alternative for community networks, providing robust, simple, reliable functionality.
Importance of Node Numbers
Node numbers are very important in the GMRS network. Each node number is also its unique identifier, key for routing and organizing communications channels. Once several nodes are connected to a hub, those nodes create a network, so your messages are more quickly routed between users.
To obtain a node number, one must fill out an online form or email support@newenglandgmrs.com, including personal details and a GMRS Call Sign. These numbers help to distinguish which channels of communication are used within the network.
They make it easy to manage user access and keep communication orderly and direct. Sequential, unique node numbers are important for maintaining order within the network. One, however, affects the other, and they serve to clearly delineate each node’s identity and function, keeping duplicity and confusion at bay.
The benefits of using GMRS for long distance communications are many. From private personal conversations to broad community outreach, GMRS is uniquely suited to a wide range of applications. The integration with Raspberry Pi makes it simple to set up and maintain, while expanding what you can do with it.
After completing the setup, eject the SD card safely from your PC. Then, plug it into the Raspberry Pi, and connect an ethernet cable to allow it to boot up. This simple process makes it easy to create a strong communication network.
Required Hardware for Setup
Setting up a GMRS hub node with a Raspberry Pi requires a few essential components, including a USB C cable for power and connectivity. These pieces combine to create a seamless communication hub, allowing for effective network interconnection and updates.
Essential Raspberry Pi Components
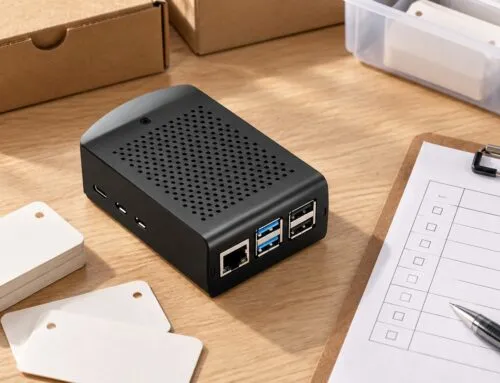
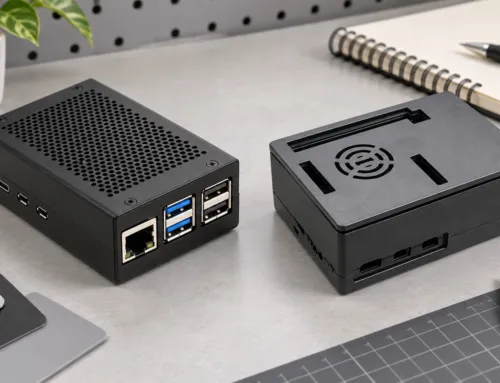
First, you need a Raspberry Pi, which serves as the brain of your GMRS hub node. Specifically, we recommend Raspberry Pi 2, 3, or 4 for their processing power and compatibility with the setup.
A microSD card, at least 16GB, is required to house the operating system and additional files. Statistics show that 90% of consumers select a card of 16GB or more, ensuring ample room for future updates and other complementary software. Accessories such as a keyboard, mouse, and monitor also play a significant role in that initial setup, especially for those using a handheld radio interface.
However, after initial setup, the Raspberry Pi can often be used headless, or without these peripherals. To avoid any connectivity issues, make sure all your peripherals are compatible with your Raspberry Pi model. The GPIO pins on the Raspberry Pi provide a direct connection to the hardware interfaces, allowing for enhanced capabilities through interaction with various devices.
By utilizing the GPIO pins and ensuring proper interconnection, you can significantly expand the functionality of your GMRS hub node. This setup not only supports radio frequency operations but also integrates seamlessly with other components, enhancing the overall user experience.
To avoid any connectivity issues, make sure all your peripherals are compatible with your Raspberry Pi model. The GPIO pins on the Raspberry Pi make a direct connection to the hardware interfaces. This allows you to significantly increase the capabilities of your device through interaction with sensors, LEDs, motors and more.
Necessary Radio Interfaces
Whether you plan to run a full hub node or a simple relay, a GMRS radio is an essential component. It also functions as the medium that connects and communicates signals to each other.
When defining your setup, the type of radio interface you go with is critically important. Compatible interfaces with GMRS hub nodes are RIM (Repeater Interface Module) or URI (Universal Radio Interface).
These interfaces get your radio talking to the Raspberry Pi, enabling powerful dual-way communication. Sound card adapters are the other major component. They change audio signals from analog to digital and back.
Getting from the radio’s configuration to the Raspberry Pi is a complicated conversion of configuration. The sound card adapter plugs into the Raspberry Pi through a USB port. It provides guaranteed latency-free audio processing, guaranteeing low-latency communication.
Choosing the right kind of radio frequency equipment is equally critical. This involves selecting the appropriate frequency band for your needs and ensuring your equipment is calibrated to deliver the best performance.
The New England GMRS image file is the required software component that brings the system into conformity with GMRS frequencies. Getting a New England GMRS Node number is necessary for identifying your node in the network.
Power supplies and cables complete the list of necessary hardware. An uninterruptible power supply lets you power your Raspberry Pi for hours or days without an outside line.
Choosing the best cables up front will eliminate these costly connection problems and save time and money by maximizing system performance.

Software and Configuration
To create your own General Mobile Radio Service (GMRS) hub node, first gather your Raspberry Pi. You’ll work through a simple process that blends software and hardware for an efficient, effective installation. The software requirements, including a USB C cable, are the threads that weave throughout this entire process.
You’ll want a Linux-based operating system, usually Raspbian, which is optimized for Raspberry Pi. A GMRS hub client software is needed. This software allows for the basic communication between the node and other GMRS devices. Keeping your platform software configuration updated is extremely important, especially when using tools like Putty for remote access.
Keeping your system up to date is one of the most effective ways to keep it running smoothly and free from future vulnerabilities. Many releases come with new performance improvements, which can make your hub node run more efficiently, particularly in terms of network interconnection.
Configuration files play an important role in customizing the hub node to best suit your specific needs. These files give access to detailed settings like frequency, power levels, and other such operations. Tweak these settings to get the best performance out of your GMRS hub, ensuring optimal use of your handheld radio.
Customize it based on where you live and how you drive to maximize your savings.
Downloading GMRS Hub Client
Essential Files to Download: GMRS Hub Client Configuration Software
Configuration File Generators Operating System Image (e.g. Raspbian)
Sources for Downloads: Official Raspberry Pi OS website GMRS community discussion boards or official websites for the client software
Verifying the integrity of the files after they’ve been downloaded is absolutely critical for a stable installation. Tools such as SHA256 checksums are incredibly helpful in confirming the files are not corrupt, ensuring a reliable network interconnection.
Installing Software on Raspberry Pi
Getting these essential software components installed requires a more involved, step-by-step process. First, install the operating system onto an SD card with Win32 Disk Imager. This utility takes care to make sure that the image is written correctly, so that the OS boots up successfully.
Once the operating system is loaded, you can move on to installing the GMRS hub client software. Follow the installation instructions step by step to avoid mistakes. Skipping steps or misconfiguring settings is a surefire way to break functionality, so following guidelines is essential.
Configuring Network Settings
Static IP Address Option
DNS Configuration
Network / Firewall Rules
Port forwarding configuration is required to let external devices to reach your GMRS hub node. By configuring your router to forward the ports you’ve specified, you can make sure your node can communicate with the outside network effectively.
A static IP address guarantees consistent connectivity. It also provides you with a more stable network identity, easing the process for other devices to discover your hub node.
Setting Up the GMRS Hub Node
Setting up a GMRS Hub node with a Raspberry Pi is easy but requires numerous steps to accomplish. You will need to integrate both hardware and software configurations to create a robust node in the GMRS Hub network.
To setup your own hub radio, first obtain a Raspberry Pi 3 or 4 and a GMRS radio. You’ll also need a Radio Interface Module (RIM) or Universal Radio Interface (URI), a New England GMRS image file, and a New England GMRS Node number.
It saves a lot of hassle setting everything up if you use a radio hat that plugs directly into the GPIO pins of your Pi. Many users also highly recommend the Hotspot Radio’s HotspotRadio PI Hat as an excellent choice. The entire process can also be controlled through an SSH Terminal if you have such network access.
1. Connect Raspberry Pi to Power
The first thing we want to do is make sure your Raspberry Pi is a stable power source. The Raspberry Pi 3 or 4 will need at least a 5V/2.5A power supply. This is very important to use a quality power system to avoid hiccups while in use.
Flaky power can leave you with very unexpected shutdowns, which can in turn corrupt your entire setup. Additional safety measures would be to use surge protectors to protect against power surges, as well as to double check that all your connections are tight.
2. Attach Radio Interfaces
Then, mount the radio interfaces to the Raspberry Pi securely. So make sure you check that your radio’s interfaces will work with the Raspberry Pi. The HotspotRadio PI Hat takes the guess work out of this by connecting directly to the GPIO pins.
Proper audio settings are important for getting the best audio through a radio, so set these per your radio’s recommendations.
3. Install and Test Software
Installing and testing the software is crucial. Start off with downloading the New England GMRS image and flashing it onto an SD card. After booting up your Raspberry Pi, verify the installation through the following tests:
Confirm the Raspberry Pi boots into the GMRS environment.
Check that the node number is recognized.
Ensure all necessary files, such as astdb.txt, are updated.
If you do run into issues, it may be worth looking through the installation logs for any errors or conflicts.
Conduct diagnostic tests to make sure the system is performing as it should, and ready for the real world.
4. Configure Radio Settings
Setting up radio parameters in the software includes changing frequency and tone settings in order to connect with other users. The main configuration file, rpt.conf, is the key to controlling these settings.
Ensure the frequency is the one authorized for your GMRS hub node. Then, set the tone settings to reduce interference and improve clarity.
5. Verify Node Connectivity
Lastly, test to ensure that your GMRS hub node is connected. Use the following checklist:
Verify that the node is correctly connected to all other nodes in the network.
Conduct a communication test to make sure that messages can be sent and received clearly and correctly.
If you encounter connectivity issues, you may want to troubleshoot network settings or ensure that the settings in rpt.conf are configured correctly.
Typical troubleshooting steps include double checking all the connections and making sure the software is updated.

Requesting a Node Number
If you’re operating a GMRS hub node using a Raspberry Pi, you need to request a node number. This is an important initial step to participating in the GMRS network. We intend for this process to be as straightforward and low-lift as possible, ensuring that everyone can easily access the necessary information.
As always, there’s no better place to get started than the GMRS Hub website. Find the button that says “Get Your Node Number” to get started. Or, if you have an account, log in, go to your account settings, and request node from there.
Regardless of the route you choose, both paths lead you to a sign-on form. You’ll need to enter some additional information, including your zip code and other pertinent details. After submitting your information, expect your unique node number to be delivered within minutes, thanks to GMRS HUB’s simplified process that makes it fast and efficient!
Registering for the event is quick and easy! This usually doesn’t come with a long lead time, making it accessible for both new and advanced users. The simplicity of this process highlights the priority placed on maintaining robust network interconnection.
By formalizing your presence through registration, you significantly contribute to the organization and reliability of the GMRS network. This helps establish a clear and efficient communication landscape for all participants, enhancing the overall experience.
Why Request a Node Number
Requesting a node number protects the GMRS community on multiple fronts. First, having a fixed node number improves communication by easily distinguishing each actor. This identification aids in structuring the entire network and enabling clear and direct communication lines.
Without a node number, aspiring users will find it difficult to get acknowledged into the network. This will create a great deal of uncertainty and miscommunication.
Node numbers are more than just a unique identifier in a geospatial database; they are vital to keeping a clean and usable network. They are also important in how they order and organize the network.
By checking that each node is represented, they help to ensure easy access and fast retrieval at a moment’s notice. Without a registered node number, you could run into major issues. You may miss out on important network events and have a harder time resolving communication glitches.
Steps to Obtain a Node Number
To obtain a node number, follow these straightforward steps:
Go to the GMRS Hub website and find the “Get Your Node Number” button.
Alternatively, access your account settings and select "Request Node."
Complete the form with your node particulars, including where you’re located and any other requested information.
Complete the form and we’ll send you your very own unique node number in no time.
When you go through the registration process, it is important to do so with correct and truthful information. This will include your address, and more information may be required.
Additionally, following FCC rules when registering is key to make sure you’re following all legal guidelines. This deliberate process ensures not only a frictionless registration experience but also reinforces the integrity and reliability of the network as a whole.
Transitioning to ASL3 Beta
Learn about ASL3 Beta, its new features like the audio enhancements, benefits, and the transition process that requires a usb c cable for optimal performance.
Overview of ASL3 Beta Features
The new ASL3 Beta version comes with a host of new features, all designed to make the user experience clean and intuitive. Here's a breakdown of its key features:
The interface is more intuitive, allowing smoother navigation and interaction.
This version offers better audio clarity and minimal latency.
New tools make it easier to customize settings to fit specific needs.
Support for a wider range of hardware, ensuring flexibility in deployment.
Enhanced security protocols to protect data and system integrity.
These features combined make for a much better user experience by delivering a more responsive and secure platform. The advanced audio processing ensures crisp and consistent communication.
This kind of clarity will be key to an improved hub node approach. The advanced configuration tools allow users to tailor the system to their precise requirements, reducing setup time and potential for error.
Transition Steps from Current Network
Moving to ASL3 Beta takes a little more planning. Here's a step-by-step guide to ensure a smooth transition:
Before making any changes, it's essential to back up your current settings. This step electronically protects your data and configurations, creating an impenetrable restore point should you ever need it.
Please be sure to upgrade any system packages with
apt-get update; apt-get upgrade -ybeforehand.Set up the system as a hub node, ensuring no added hardware to minimize variables.
Keep an eye on system load and performance. As the system has been running for over 283 days with a very consistent load average, be sure to maintain that level of stability after the transition.
Users have reported issues on Pi 4B with 2GB RAM, such as system lock-ups and login difficulties. It’s important to keep an eye on these areas and try to bump up RAM or test on other hardware.
During the transition, some users were treated to a kernel message about the bcm2835_codec module, telling them that the quality is unknown. This warning speaks to the need for using stable, proven combinations of hardware and software.
Importance of User Feedback in Beta Testing
Your experience and feedback are essential for improving ASL3 Beta. This really helps us catch bugs, direct our improvements, and make sure the final release will be what you all are looking for!
A user, subjunk, reported always getting lock-ups, even with clean installs, which likely indicated some sort of hardware or software bug. Such insights are incredibly valuable for developers to focus on fixing high-impact issues and improving system reliability.

Conclusion
Setting up a GMRS hub node with a Raspberry Pi gives you a hands-on way to dive into radio communication. You now have the key steps: gathering the right hardware, configuring the software, and getting your node number. With the transition to ASL3 Beta that flexibility and features go a step further. Beyond enhancing your technical capabilities, this configuration also links you to a larger network of radio operators. Set up your node today, and continue exploring all the amazing things you can do. Whether you’re listening for faraway transmissions or broadcasting community news, GMRS opens up a new world of communication. Explore and discover all of the possibilities!
Frequently Asked Questions
What is a GMRS hub node?
A GMRS hub node, which requires a USB C cable for connectivity, allows many GMRS radios to connect through the internet, essentially bridging them together. This setup opens up a much wider world of communications, making a Raspberry Pi an ideal host for this configuration.
What hardware is needed to set up a GMRS hub node with a Raspberry Pi?
You’ll want a Raspberry Pi (3 or newer), USB sound card, GMRS radio, and the right USB C cable. Ensure that your equipment, including the handheld radio, will work together before setting everything up.
What software is required to configure a GMRS hub node?
We recommend using AllStarLink software for setting up your Raspberry Pi. It’s open-source, and it’s rock solid for GMRS nodes. Follow their documentation for installation and configuration.
How do I set up a GMRS hub node on a Raspberry Pi?
Once you have your hardware collected, including a USB C cable for proper connections, it’s time to install AllStarLink on your Raspberry Pi. Attach it to the GMRS radio you’re using as the hub node, ensuring the network interconnection is correctly configured. Follow these configuration steps to make sure everything can communicate correctly, and refer to the thorough how-tos available online.
How do I request a node number for my GMRS setup?
Visit the AllStarLink project website to register for a node number, which is crucial for proper network interconnection. Approval typically only takes a matter of days, allowing for swift access to the system.
Why transition to ASL3 Beta?
ASL3 Beta features improved functionality and stability, requiring a proper hub node setup for optimal performance. This upgrade is recommended for experienced users looking to enhance their network interconnection.
Is prior technical expertise required to set up a GMRS hub node?
It is assumed that the user has a basic understanding of Raspberry Pi and radio communication, including concepts like network interconnection and the use of a USB C cable, making it relatively easy for a novice.





Leave A Comment