 Skip to content

I once stayed up late, worried about the annoying hum of my Raspberry Pi’s fan. That buzz kept me awake, and it made me wonder if there was a way to tame that tiny whirlwind. I learned that controlling fan speed matters because it helps with noise reduction, temperature management, and energy efficiency. From my experience, a fan that never stops running at full tilt wastes power, and it can even shorten the fan’s life. It also makes me think about those times when every decibel of sound could disrupt my work. That’s why I want to share what I’ve learned.

I remember thinking, “Is it really possible to make the fan more peaceful?” That question led me to practical solutions and hands-on methods. I’ll show you in the next section what drives this fan speed control and why it’s such a big deal.
Understanding Raspberry Pi Fan Speed Control
Controlling fan speed is not just about convenience. It’s also about balancing performance and longevity. I question if it’s always necessary for the fan to spin at maximum capacity when you only need moderate cooling. Let’s break down the basics.

What Is Fan Speed Control?
I like to think of fan speed control as a traffic signal for power delivery to the fan. If I’m using PWM (Pulse Width Modulation), I’m basically turning the power on and off rapidly. This method lets me adjust the fan’s speed without delivering constant maximum power. On the other hand, there’s voltage regulation, where I set a lower voltage to slow the fan. I always consider that PWM fans are more precise, but I can also manage with simpler methods.
From a critical perspective, PWM is often more efficient. Yet, I remind myself that not every fan is made for PWM. Some cheaper fans can struggle with the rapid on-off cycles. That’s why it’s always wise to check compatibility. It’s one more example of how one solution doesn’t work for everyone, especially if we look at cost constraints or project requirements.
Transition to next sub-topic (under 40 words)
I found a new appreciation for adjusting fan speed after I saw its benefits firsthand. Let me share them next.
Benefits of Adjusting Fan Speed
I realized that controlling fan speed extends the fan’s life. When a fan doesn’t run full blast all day, it avoids the wear and tear that comes from endless strain. I also like how it reduces noise, which is huge for me when I work late. In the heat of summer, I don’t want to lose focus because the fan roars like a small jet. Then there’s power consumption. I’ve seen my own system run cooler and more efficiently by letting the fan spin only when necessary.
But I also question if lowering speed might lead to overheating. This is why I recommend a middle ground. I track temperature, set my thresholds, and let the fan step up when it’s needed. That approach respects both performance and safety. I hope more people adopt this mindset instead of letting the fan run at one extreme.
Hardware Approaches to Changing Fan Speed
Sometimes, hardware solutions feel intimidating. But I find they can be very reliable. They often let me control the fan speed in a consistent and robust way. I want to share three main hardware approaches that have worked for me and for many others I’ve met.
Using a PWM Fan
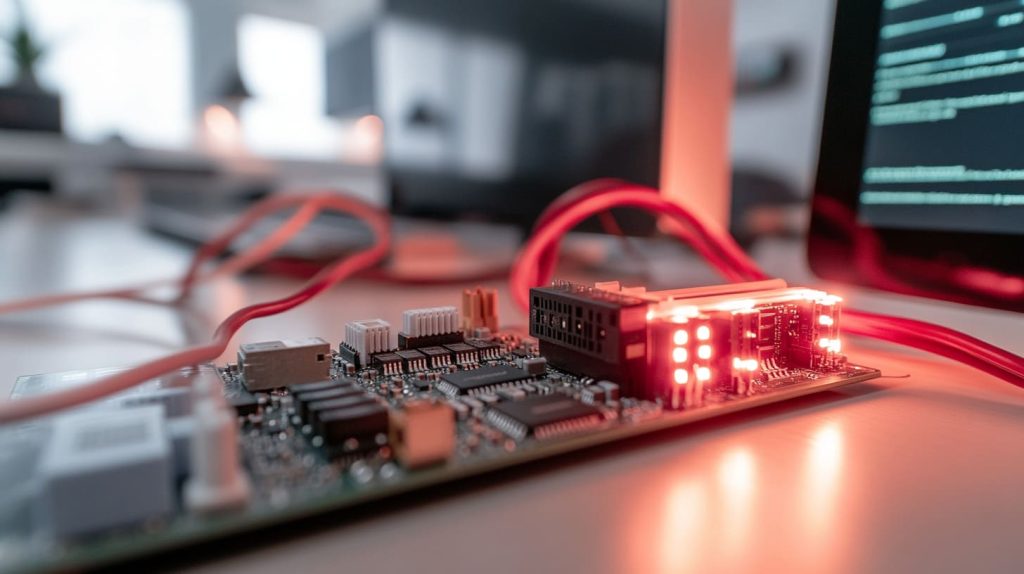
A PWM fan is the easiest way to manage speeds without extra electronics. It comes with a control wire that reads the signal from the Raspberry Pi’s GPIO pin. I like how it feels plug-and-play, assuming I have the right fan. The main difference from a standard fan is that it has four wires: ground, power, tachometer, and PWM control.
I also recall a friend who tried to use a 3-wire fan in a PWM setup. He ended up with a lot of whining noise because that fan wasn’t designed for constant voltage switching. This is why I suggest reading the product specs. Let’s see a quick comparison table:
| Fan Type | Wires | Typical Control Method | Pros | Cons |
|---|---|---|---|---|
| 3-Wire | 3 | Voltage Control | Common and cheaper | Less precise, can introduce noise |
| 4-Wire (PWM) | 4 | PWM Signal | Precise speed control | Slightly more expensive |
I look at these differences and wonder if paying a bit more for a PWM fan is worth it. I say yes if I need tight control. But if budget is critical, I might lean toward a 3-wire solution and accept some quirks.
Using a Transistor or MOSFET for Control
When I want more flexibility or I already own a standard 3-wire fan, I use a transistor or MOSFET. I set up a small circuit with the fan, the transistor, and a resistor. The GPIO pin signals the transistor to switch power on and off. This is simpler if I’m comfortable with electronics. But I must be careful with the wiring, especially with current ratings. Mistakes can lead to burnt components.
I think about the day I tried to control a big fan that drew too much current. I learned the hard way that the transistor got really hot without a proper heatsink. From a critical perspective, it’s vital to match the hardware to the fan’s specs. That’s why I recommend double-checking datasheets and not assuming the same transistor can handle every fan.
Using a Dedicated Fan HAT or Shield
Some people prefer a dedicated HAT. It’s a small board that’s designed to sit on top of the Raspberry Pi. It typically comes with its own circuitry and software to regulate fan speed. I like that it simplifies everything into a neat package. I’ve tried the Pimoroni Fan SHIM before. Installation is straightforward, and their script handles speed control automatically.
But I also question if a HAT might block access to other GPIO pins. It’s a valid concern for bigger projects that need more expansions. I weigh that issue against the ease of use. That’s why I carefully plan if I need other connections before picking a fan HAT. This is where a little critical thinking can save me from having to reorder parts later.
Transition to next main topic (under 40 words)
I once forgot to plan my hardware approach, and it caused some chaos. If you’d like something simpler or more flexible, software control might be your next step.
Software Methods for Fan Control
Software control often feels like magic to me. I change a line or two, and suddenly the fan obeys new temperature rules. Let’s look at some software-based methods and see how each one can help.

Using built-in Raspberry Pi OS Settings
Raspberry Pi OS lets me set temperature thresholds in config.txt. That means the system will spin the fan when the CPU hits a certain temperature. I just tweak the parameters, reboot, and it takes effect. It’s simple, though it may not allow for multiple speed levels. It’s usually just on or off.
I also wonder if a single threshold is good enough. Some projects produce a lot of heat quickly. Others barely break a sweat. That’s why I encourage exploring multiple thresholds if possible. Still, the built-in method is a nice starting point for many.
Using Third-Party Utilities (e.g., fancontrol)
The [fancontrol](https://embeddedcomputing.com/technology/processing/compute-modules/raspberry-pi-os-fan-control) utility is another good option. I install it on Debian-based systems, configure it, and let it watch the CPU temperature. It adjusts fan speed dynamically. I love how I can define custom temperature zones. This approach is more flexible than the built-in setting.
But I also notice a learning curve. The config files are not always user-friendly. I recall spending a few afternoons fiddling with them. From a critical perspective, I have to decide if investing that time is worth the precision gained. For bigger projects that require tight management, it might be.
Writing a Custom Python Script
Sometimes, I just code my own solution. I use libraries like RPi.GPIO or pigpio to read CPU temperature and then set a PWM signal on a GPIO pin. I create a feedback loop that speeds up the fan when things get hot and slows it down otherwise.
I love that this approach gives me full control. I can set multiple thresholds, log data, or even send alerts. But I also remind myself that I have to maintain the script. If something changes in the system, I might have to tweak the code. It’s a trade-off between customization and convenience.
Transition to next main topic (under 40 words)
I remember coding a custom script late at night, testing each temperature trigger. If you prefer an automated approach, keep reading because I’ve got more to share.
Automating Fan Speed Based on Temperature
Automatic speed control feels so satisfying. I set the rules once, and the system handles itself. This is where I breathe easy and trust my Raspberry Pi to do the heavy lifting.

Establishing Temperature Thresholds
I begin by deciding what temperatures are safe. The Raspberry Pi CPU typically runs okay up to around 80°C. But I prefer to keep it much cooler. I set different zones, like low speed at 50°C, medium at 60°C, and high at 70°C. If I see the Pi climbing too fast, I might lower those thresholds.
In a more critical sense, I look at my environment. My workshop in China can get hot in summer. So, I adjust thresholds based on actual conditions. If you’re in a cooler region, you might not need aggressive fan speeds.
Creating a Temperature Feedback Loop
A feedback loop is just a series of checks. Every few seconds, I read the CPU temperature. If it’s above a threshold, I increase the fan. If it’s below, I decrease it. This keeps the fan stable most of the time. The trick is to avoid rapid toggling. I add some hysteresis to let the temperature settle before changing fan speed again.
I also wonder how quickly the Pi’s temperature can spike. If I run heavy tasks, the temperature jumps. That’s why a well-defined feedback loop is critical. I might even allow the fan to ramp up to 100% if something intense happens. Then it settles down once the load goes away.
Common Troubleshooting and Best Practices
I’ve broken a few fans and baked a few Raspberry Pis during my experiments. Over time, I’ve learned best practices that kept me out of trouble. Let me share them.
Ensuring Proper Cooling
A fan alone might not fix everything. I also check airflow around the Pi. If I stuff it in a closed case with no vents, the heat has nowhere to go. I also use thermal paste and a heatsink for the CPU. Sometimes, the solution is as simple as re-positioning the case.
I think about how I used to place my Pi on a small windowsill, next to direct sunlight. That was a bad idea. I had to move it to a shaded area to help keep the temperature stable.
Avoiding Under-Voltage and Overheating
I pay attention to the Pi’s little lightning bolt warning. If I see it, the supply might be too weak. A struggling power supply could lead to undervoltage, and that can cause performance issues or random reboots. On the overheating side, letting the CPU rise above safe levels is risky. That’s why I track both voltage and temperature in real time.
A quick table might help illustrate the potential problems and solutions:
| Issue | Symptom | Potential Solution |
|---|---|---|
| Undervoltage | Lightning bolt icon, slow Pi | Use stable power supply (5V 3A+) |
| Overheating | CPU throttling, performance drops | Improve cooling, reduce load |
| Noise issues | Distracting hum or vibrations | Lower speed, add dampeners |
Noise and Vibration Reduction Tips
When the fan vibrates against the case, it amplifies noise. I’ve used rubber grommets and small foam pads to soften the contact. Fan alignment also matters. If it’s tilted, the blades might scrape. I once received a batch of cheap fans with unbalanced blades, which led to constant rattling. That taught me the value of good quality control.
Transition to next main topic (under 40 words)
Now, if you are thinking about large orders or custom solutions, let’s discuss how to handle fan speed control on a bigger scale.
Considerations for B2B and Custom Projects
In my line of work, I often handle bigger orders for people who want to re-brand or even design their own products. There are extra angles to think about, like lead times and branding. I hope these insights help anyone who’s scaling up.

Bulk Ordering and Custom Branding
When I handle bulk orders, price and lead time become crucial. If someone needs their own logo on a fan housing, that adds production steps. I always compare the cost of large-scale standard fans versus customized ones. I weigh the time needed for branding or labeling, then see if the client’s timeline can handle it.
But I also ask if the client’s brand stands to benefit. Some prefer standard fans to save money, while others want the brand on everything. It’s a business decision that mixes marketing goals with practicality. That’s why I recommend open communication about budgets and delivery timelines.
Quality Control and Fast Delivery
Quality control in a big order is more than a buzzword for me. If I ship thousands of fans that have a design flaw, that’s a major headache. I check them in smaller batches, do temperature tests, and confirm the speed control functions. I also find ways to expedite shipping without risking damage or delays. My best advice is to keep verifying each step, from assembly to packaging.
I also realize that different time zones can slow communication. I learned to clarify details upfront and confirm them twice. This practice saves me and the client from stressful misunderstandings.
Collaboration for ODM Projects
I see an ODM project as a chance to build something unique. When someone like Lasle comes in with a fresh design idea, I enjoy supporting those changes. But there’s a lot to consider: retooling for a custom case, setting up a specialized fan mount, adjusting airflow patterns. I engage in constant communication so we can refine the prototype together.
I also respect the fact that creative projects evolve. That’s why I stay flexible with design changes. I just keep track of how each tweak affects manufacturing time and cost. Critical thinking here means asking, “Will this improvement really matter, or is it a nice-to-have feature?”
Conclusion
Managing Raspberry Pi fan speed can make a real difference. I love the calm when the fan runs only as much as it needs to. Whether you use hardware solutions, software tweaks, or a mix of both, you’ll get a cooler, quieter, and more efficient setup. For bulk orders or custom designs, the same principles apply—just on a bigger stage. I hope this post helps you find the sweet spot for your Raspberry Pi projects, no matter how large or small.










Leave A Comment