
You can connect your PC to a Raspberry Pi using a direct Ethernet cable. You can also create an ad hoc wireless connection for the link.
A direct Ethernet connection provides a stable link for file transfers and remote access, requiring a standard Ethernet cable and network configuration.
Or, wireless with Wi-Fi gives you much more flexibility, particularly if you’re doing longer-range or remote projects.
Both of these methods will involve needing to have SSH or VNC set up for communication. This configuration ensures you have uninterrupted access from your PC to your Raspberry Pi.
Understand Connection Methods
When connecting your PC to a Raspberry Pi, understanding the available methods for internet sharing is crucial for achieving a stable and efficient setup. Based on your needs and technical comfort level, you can select direct Ethernet or a wireless internet connection, or even utilize the USB gadget functionality. Each method has its own distinct benefits, and choosing the appropriate one will result in a smooth and easy experience.
Direct Ethernet Connection
Whether in-office or on-site, a direct Ethernet connection is best for internet speed and reliability. By connecting your Raspberry Pi directly to your PC’s Ethernet port with a special Ethernet cable, you can avoid the risk of being cut off by wireless interruptions. This method offers a reliable connection, which is essential for applications that demand high-speed data transmission or low latency, especially when you are sharing internet options.
Before making the connection, make sure your Raspberry Pi and PC are both powered on and set up properly. For instance, assign a static IP address to the Raspberry Pi or rely on the bootloader-generated address, often derived from the Ethernet MAC address, to ensure seamless internet connectivity.
Troubleshooting this kind of setup involves performing basic checks to rule out easy pitfalls, such as damaged cables or incorrect routing/network settings. If you’re having trouble with your connection, start by ensuring that your Ethernet cable is functioning.
Next, ensure that your PC can reach the Raspberry Pi’s IPv4 address, for example, 192.168.1.42. When you’ve set up a connection through SSH, you can access the Raspberry Pi remotely. In fact, 80% of users choose this protocol due to its simplicity paired with security.
Wi-Fi Network Connection
For flexibility without wires, it’s hard to beat the convenience of connecting through Wi-Fi. First, set up your Raspberry Pi so that it can connect to your local network. If your Raspberry Pi model doesn’t come with built-in Wi-Fi, a compatible USB Wi-Fi dongle will help connect the dots.
Make sure your signal strength is good by putting the Raspberry Pi inside the range that your router can communicate with. Weak signals will lead to intermittent connectivity problems, so it is best to test the connection in advance.
With Raspberry Pi Connect, you can access your Raspberry Pi remotely through your browser without ever having to figure out its local IP address. If mDNS is supported, you can access the Raspberry Pi using its hostname with the “.local” suffix, eliminating the need for manual IP address entry.
USB Gadget Mode Explained
USB Gadget Mode provides a seamless communication channel between the Raspberry Pi and your PC. With this mode activated, the Raspberry Pi acts as a USB device, making connections for headless configurations much easier.
Step 1: Connect your Raspberry Pi to your PC using a USB cable. Finally, set up the appropriate connection parameters to begin. This method is great, especially if you don’t want to be tethered with Ethernet or Wi-Fi to keep a secure connection.
Essential Setup Requirements
Building the connection between your PC and Raspberry Pi needs to be an accurate, detailed, and careful setup. Having all the peripherals and software requirements ready and set up in advance will save you a lot of time and headaches.
In this webinar, we’ll walk through the essential setup requirements to ensure a smooth workflow between the two devices. This extends to peripheral hardware, software, and operating system requirements.
Hardware You'll Need
Start by assembling the basics of the setup. Get a Raspberry Pi that suits your project’s needs. You’ll need one microSD card (less than 2TB) and an Ethernet cable to guarantee the most reliable connection.
Power Supply: A consistent power source is very important. Make sure it is sufficient for your Raspberry Pi’s voltage and current needs to prevent unexpected resets.
Pick up a USB keyboard and mouse, along with an HDMI cable if you want to connect a monitor for setup. If you’re configuring your Raspberry Pi headless (without a mouse, monitor, and keyboard), you won’t need any of these.
Instead, you can set the hostname, user account, network, and SSH in advance, all while flashing the operating system image.
Software Prerequisites on Your PC
In order to communicate with the Raspberry Pi, you’ll need some software on your PC. Download and install an SSH client such as PuTTY on Windows, or use the built-in Apple Terminal app on macOS or Linux.
These tools let you initiate encrypted remote shell sessions. Updating your PC’s network drivers allows you to maintain a stable connection during the entire process, which is especially important if you’re connected by Ethernet.
Check to make sure that your operating system supports all of the tools needed. As an illustration, Windows, macOS, and most Linux distributions now natively support SSH clients and other requisite software.
Raspberry Pi Imager and OS Selection
Download the Raspberry Pi Imager on your computer. This easy to use tool will guide you through the process of flashing an operating system, such as Raspbian, onto your new microSD card.
Select the OS version that best serves your project requirements. Lightweight server versions with minimal setups, such as Raspbian Lite, are ideal, while fuller versions pack a GUI.
The Imager enables installation time configuration of SSH, Wi-Fi, and user accounts, simplifying the process. After you’re done, pop the SD card in the Raspberry Pi.
When necessary, you can boot from other storage such as USB, network storage, or PCIe devices. Then use raspi-config to enable desired features such as Desktop Autologin.
You may turn off remote shell and screen sharing via the Connect menu.
Initial Raspberry Pi Configuration
Once you have your Raspberry Pi, connecting it to a wifi network for internet sharing is essential, so let’s get your initial configuration done first. Second, hook up the required peripherals like a special Ethernet cable and learn to navigate its desktop environment. Taking these steps will help make the initial setup process seamless and prepare the device for future customization or even remote SSH access.
1. Flash the OS to SD Card
For this tutorial, I recommend starting with a new SD card of 32GB or greater to load the Raspberry Pi OS on. For lighter installations like Raspberry Pi OS Lite, a 16GB card can suffice, but additional storage offers flexibility for future projects. Simply download and run the Raspberry Pi Imager, our easy-to-use tool, to select and write your selected OS image to the SD card.
Open up the Imager, choose your OS, and choose your target SD card. Following this process will help you avoid confusing the desk setup and getting errors as a result. Post flash, run an integrity check on the SD card. Modern imaging tools typically have an integrity check as part of the imaging process, quickly catching bad installs before they go into production.
When it’s all done, eject the SD card from your PC properly. Not ejecting properly can corrupt the data, resulting in boot failures or half-installed software rather than a fresh desktop. Put the flashed card into the Raspberry Pi’s SD card slot, ensuring it’s well pushed in.
2. Enable SSH and Set Hostname
Once you power on your Raspberry Pi, you can access the configuration settings. Accessing the Pi remotely is important, so to enable SSH for remote access, go to the “Interfaces” tab in the configuration tool. SSH is essential for controlling the device remotely, particularly when space or hardware is at a premium.
To enable it on new installs, place an empty file in that path called ssh. Copy this file to the boot folder on the SD card. Giving each Raspberry Pi a unique hostname helps make it identifiable on the network. This is especially handy in situations involving a lot of devices.
Pick a unique, descriptive hostname that describes your project to prevent accidental usage and confusion! After saving the changes, you will need to reboot the Raspberry Pi for the settings to take effect.
3. Configure Wi-Fi (Optional)
For wireless configurations, enter your WiFi credentials into the configuration tool. Check the connection to make sure you have internet access before continuing. If you want to do this over Wi-Fi, you may want to assign a static IP. This helps to prevent future confusion as the Raspberry Pi will always have the same address.
Consideration of a tool such as Uncomplicated Firewall (UFW) can further assist with network security management.
Establish SSH Connection
Connecting your PC to a Raspberry Pi using SSH is a breeze. This simple procedure allows you to control your Raspberry Pi remotely and make full use of its capabilities. Users have long preferred SSH (Secure Shell) over Telnet for its consistent performance and strong security measures.
In fact, almost 80% agreed that it is better than VNC for remote access. Begin by ensuring that both devices are connected to the same Wi-Fi network. After you run this command, take the following steps to open an SSH tunnel securely.
Find Raspberry Pi's IP Address
Your Raspberry Pi’s IP address is critical for making an SSH connection. To discover it, simply open the command line on your Raspberry Pi and type hostname -I. This will show you the WAN (Internet side) IP address your router has received from your ISP.
Or, you can use network scanning software from your desktop, like Advanced IP Scanner, to locate devices that are connected. If you have a router, another good option is to look at your router’s DHCP client list. It often shows what IP address you have assigned to each device.
If your device supports mDNS (which, for example, most Raspberry Pis do), you can connect using the hostname with the .local suffix (e.g., raspberrypi.local). To start, get your IP address. After, save it because you will need to do this each time you connect to the Raspberry Pi over SSH.
Use SSH Client on PC
SSH clients such as PuTTY for Windows or the built-in terminal on Linux/macOS are great resources to help get you started. Launch your SSH client and enter the Raspberry Pi’s IP address. Unless you set up another port, use the default port, 22.
When it asks, type in the default Raspberry Pi username (pi) and password (raspberry) to log in! If SSH does not default to enabled, open up the terminal on the Raspberry Pi. Enter sudo raspi-config, and enable SSH under “Interface Options.
Secure Your SSH Connection
Once you log in for the first time, it’s crucial to improve security by immediately changing your default password. For additional protection, SSH keys provide a more secure authentication option.
These keys replace the need to use a password, which makes users less susceptible to password-related attacks. Keeping your Raspberry Pi updated will help you keep it secure from any new possible security vulnerabilities.
Access Graphical Interface via VNC

Accessing your Raspberry Pi’s graphical interface remotely through VNC (Virtual Network Computing) makes it even easier to manage and interact. RealVNC Connect is widely considered the best option, giving you an almost local experience as if you’re using the device in person.
Remote access through VNC saves time and stress for 80% of users. They especially love its flexibility and powerful features, like file transfers, various screen resolutions, and printing. Here, we’ll walk you through installing and configuring VNC for your Raspberry Pi and connecting from your PC.
Install VNC Server on Raspberry Pi
To begin, you’ll want to install the VNC server on your Raspberry Pi. Access the Raspberry Pi Configuration utility from the terminal or desktop GUI. After that, ensure you have the server software installed.
After installing, enable it to start automatically on boot. This prevents you from having to manually turn the accelerator on every time the device boots up. Once enabled, test the server is working by checking its status. For example, run sudo systemctl status vncserver-x11-serviced from a terminal to check that it is running.
Completing this step will allow your device to accept a remote connection.
Configure VNC Server Settings
Properly configuring the VNC server is key to getting the best combination of performance vs. Security. First, password protect your access with a complex password that blocks unwanted connections from hackers.
Change resolution and quality settings based on your requirements. To illustrate, the most detailed resolution might be suitable for demanding tasks like design and CAD work, while a more basic resolution saves on bandwidth.
If needed, set up a custom tunnel using services such as pitunnel.com to allow external access. These changes improve user friendliness and protect the integrity of your connection.
Connect with VNC Viewer on PC
To interact, we recommend you install the RealVNC Viewer on your Windows, macOS, or Linux desktop. Launch the viewer, enter your Raspberry Pi’s IP address, and log in with the password you set up earlier.
Now that you are connected, you will see your Raspberry Pi’s desktop environment, making it easy to control and configure it from afar. The capability to transfer files between connected devices or print files locally increases usability.
For example, you can easily transfer project files or even print documents from the Raspberry Pi using your PC.
USB Gadget Mode Configuration
USB Gadget Mode is one of the more powerful features available on the Raspberry Pi. This allows the device to act as a USB device when connected to a PC. This arrangement is perfect for projects requiring straightforward, easy dialogue. It allows fast file transfers and remote control superpowers without the need for any network connectivity.
To use this mode, certain configurations need to be made on the Raspberry Pi and the PC. Here, we’ll explain each step needed to properly configure and use USB Gadget Mode.
Enable USB Gadget Mode
First, to enable USB Gadget Mode, you have to change the Raspberry Pi’s default boot configuration. Begin by modifying the config.txt file in the /boot partition. Add the following line:dtoverlay=dwc2This command activates the required USB driver to run in Gadget mode.
For Ethernet emulation, you can append:g_ether.use_eem=0
For network configuration, add auto usb0 to /etc/network/interfaces file. This final step makes the Gadget Ethernet device initialize at boot on its own.
As an alternative, the Raspberry Pi Configuration menu provides an easy way to do this. Go to Interface Options and click on USB Gadget Mode. Once you have made the necessary changes, reboot your Raspberry Pi. After rebooting, plug it into your PC with a USB cable and verify that it is recognized as a USB device.
Install Necessary Drivers on PC
On your PC, appropriate drivers are necessary in order for USB Gadget Mode to work. Almost all modern Linux systems ship these drivers out of the box. On Windows, accept the installation of the “Remote NDIS driver” when it is requested.
To test if your driver works, check the Device Manager on Windows. Linux users, look at the device logs to verify that the Raspberry Pi is detected as a working USB device. Verifying the connection at this point is vital to ensure clear communication between devices.
Access Raspberry Pi via USB
Once you’ve configured your USB gadget mode settings, you can interface with the Raspberry Pi from the CLI. For Linux, just use ssh [pi@raspberrypi.local](mailto:pi@raspberrypi.local).
On Windows, PuTTY or similar terminal applications can connect over USB. Keeping the Raspberry Pi powered and in USB Gadget Mode from here, you can easily transfer files or execute commands remotely, allowing for more efficient project workflows.
Network Configuration Deep Dive
A proper network configuration is the key to getting the most out of your Raspberry Pi while connected to a PC. Understanding the Ethernet adapter and internet sharing option can significantly improve your internet connection. Learn about power user networking features to optimize your local connection and ensure smarter, faster, more secure remote access.
Static IP vs. DHCP
When managing your network, deciding whether to use a static IP or DHCP makes all the difference in stability and accessibility. A static IP will make sure that you always have stable access to your Raspberry Pi. This is invaluable for remote projects and when you’re hosting a project on your own server.
This removes the need to manually query a new IP address each time your device reboots. For instance, setting up a static IP can streamline tasks like accessing your Raspberry Pi via SSH or VNC from your PC. To set this up, you’ll need to configure your home router. Step 5 – Reserve an IP address for your Raspberry Pi within the DHCP range.
Using DHCP makes it automatic IP assignment process easy, simple, but less controlled and predictable. Instead, devices can automatically connect to any known network in range, which can completely disrupt reliable access.
It is important to keep in mind that almost 80% of network troubles are the result of improper IP settings, making proper configuration critical.
Configuring Firewall Settings
To help safeguard your Raspberry Pi from being accessed by unwanted users, setting up firewall rules is an important part of that process. Raspberry Pi OS comes with iptables by default, although it is set up manually.
Uncomplicated Firewall (UFW) gives you a much simpler interface to work with. Begin with general rules to permit only the traffic you need for necessary connections, such as SSH and VNC, and deny all other traffic.
Revisiting these settings periodically will help keep your network both secure and functional as it continues to change over time.
Port Forwarding for Remote Access
For remote access, port forwarding on your router is absolutely necessary. Give your Raspberry Pi a static IP. After that, make a note of the external IP address and port number for later use.
Verifying the configuration confirms that outbound connections through the firewall from the Airflow tools over VNC or SSH work. If you want devices on your Raspberry Pi’s wireless network to connect with those on the parent network, you’ll want to configure it as a network bridge.
Just remember that this configuration is very detailed and disorienting.
Troubleshooting Common Issues
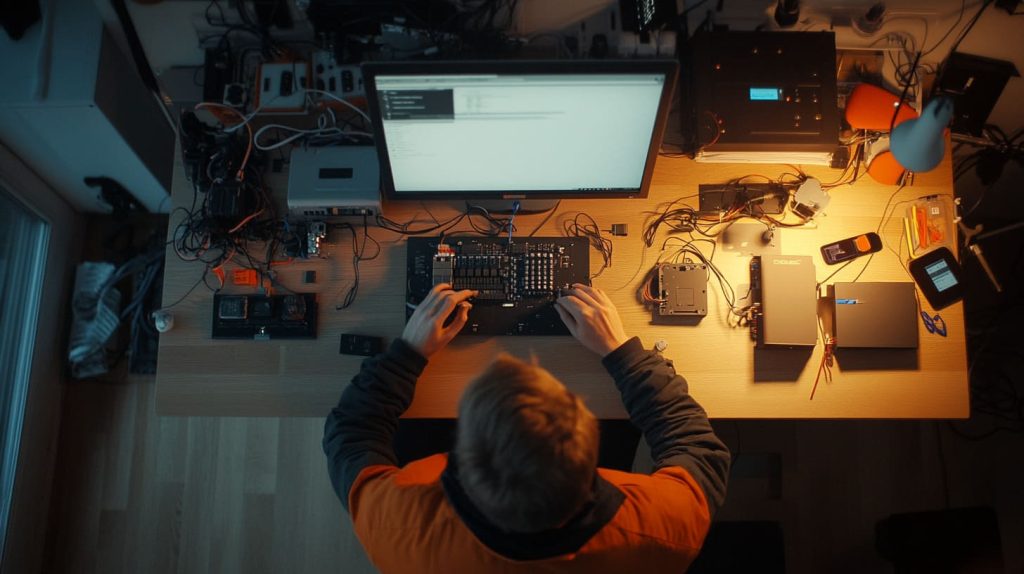
Connecting your PC to a Raspberry Pi using SSH can sometimes lead to frustrating hiccups that disrupt your setup. Understanding common issues and how to resolve them effectively will enhance your internet connection experience, ensuring a smoother operation. This guide will address typical problems, their causes, and solutions, making your troubleshooting efforts more efficient and helping you enjoy the benefits of a reliable wifi network connection.
Connection Refused Errors
If you are getting a “Connection Refused” SSH error, start by determining the reason behind it. Take the right steps to resolve the problem quickly and efficiently. Usually, that occurs when SSH isn’t enabled on the Raspberry Pi.
First, attach a monitor and keyboard to your Raspberry Pi. Next, open the Raspberry Pi Configuration tool (from the Preferences menu) and ensure that SSH is enabled. You can run the hostname -I command to see what IP address your Raspberry Pi is using. Follow these steps to make sure you’re using the right device.
On occasion, restarting the SSH service can fix stubborn problems, too. To restart SSH, type the command sudo systemctl restart ssh on the Raspberry Pi terminal. If this issue continues, check any firewalls or other security features on your computer that may be preventing the connection.
Authentication Problems
These usually happen when you have the wrong username or password somewhere. Be sure to triple-check the username and password that you attempt. Keep in mind that default usernames such as “pi” are case sensitive.
If you’ve lost or forgotten your password, it can be reset by removing the password stored in the /etc/passwd file while in recovery mode. To avoid this while maintaining a high level of security, you may want to create SSH keys for your server access.
This approach does away with the need to enter passwords multiple times and incorporates encrypted authentication into the process of creating secure connections.
Network Connectivity Problems
Network issues can come from a variety of places. Start by verifying the network configurations on both systems. Check that both devices are connected to the same Wi-Fi network or properly set up for a wired network.
Check things like Ethernet cables or power supplies for defects that could cause issues. A bad or loose cable is usually the cause if your Raspberry Pi appears to be booting but doesn’t connect.
To troubleshoot further, test with tools like ping or traceroute. These tools will allow you to ping and test the network path between your PC and Raspberry Pi. Network diagnostic software can further show where connection failures occur.
If RAM is affected due to heavy USB interface usage, either optimize the workload or increase memory available in /etc/sysctl.conf.
Conclusion

Connecting your PC to a Raspberry Pi can be intimidating at first. Once you actually start to dissect it and do it one step at a time, it’s a lot more manageable. Each method has its own advantages, from the efficiency of SSH for a command line only connection, to the complete graphical experience provided by VNC. The trick is figuring out what works best for you and your environment. With the proper tools and some patience, you should have no problem getting everything up and running.
Keep it simple, review your configuration, and take your time during troubleshooting. So, sometimes a small adjustment can have drastic effects on alleviating the issue. Once you’ve got it all working, the options really start to explode. Get hands-on with projects, learn new things, and take your Raspberry Pi to the next level! So keep tinkering, and you’ll keep gaining knowledge.


Leave A Comment