
As with most things Raspberry Pi, curiosity runs high about what it can do, including whether or not it can run Windows. The compact, versatile, and affordable device has become popular among hobbyists and educators, and it can run multiple operating systems.
While it can’t run Windows 10 or 11 directly, a lighter version, such as Windows IoT Core, is compatible. This version is specifically optimized for IoT devices, providing a focused Windows experience on Raspberry Pi.
Exploring this potential further unlocks exciting opportunities for makers, educators, and industry leaders to explore.
Can Raspberry Pi Run Windows?

The idea of running a full-blown Windows experience on a Raspberry Pi, particularly the powerful Raspberry Pi 5, is a tantalizing prospect for many tech enthusiasts. The possibility of this undertaking depends on a number of factors, from the model’s compatibility to the collective, community-driven work involved.
Now, with the more powerful Raspberry Pi 5 at our disposal, the processing power of the Raspberry Pi makes it an exciting platform for Windows. The ARM architecture, which all Raspberry Pi devices use, is an important piece of the puzzle. You might be able to install Windows versions (versions specifically developed for ARM, though).
Surprisingly enough, this is all possible despite the fact that Microsoft does not officially support Raspberry Pi devices. The community is still going strong, with developers working around the clock to get Windows working properly on these devices.
Raspberry Pi Compatibility with Windows
Generally speaking, only the latest few Raspberry Pi models can realistically run a Windows installation. As usual, the main emphasis is on the Raspberry Pi 4 and 5. Compatibility with Windows is due in part to the ARM architecture, allowing these devices to run ARM-specific iterations of Windows.
The biggest challenge comes from the complete absence of official support from Microsoft for Raspberry Pi devices. What the community has accomplished is nothing short of amazing. Innovators such as Botspot have built automated installation processes that take a previously complicated installation process down to a few clicks.
Thanks to this breakthrough, users are now able to install Windows right from their Raspberry Pi 4. They should be aware of a slower installing process, sometimes taking more than an hour.
Windows Versions for Raspberry Pi
The ARM64 versions of Windows 10 and Windows 11 are the most applicable for Raspberry Pi. Consider these versions of Windows when deciding. Originally, users could just run Windows 10 IoT Core, a scaled-down version without a full desktop interface.
Windows 11 makes some subtle but important changes to compatibility compared to Windows 10. It ships with advanced capabilities that have been purpose-built for ARM architecture. It’s important to use the ARM64 versions to get the highest performance.
This means applications run smoothly and take full advantage of the Raspberry Pi’s power.
Benefits and Drawbacks of Running Windows
Running Windows on Raspberry Pi offers several benefits, such as accessing familiar Windows applications and potentially using Visual Studio for development. There are disadvantages, namely performance issues and compatibility with certain applications.
The community-driven solutions help to foster a friendly development ecosystem for users migrating from Windows PCs. They may not provide the computing power that standard desktops usually provide.
The bundled Edge web browser delivers a great browsing experience, too. While its boot times are significantly longer than those of Raspberry Pi OS, many users consider them to be perfectly reasonable nonetheless.
Installing Windows on Raspberry Pi

Having Windows running on a Raspberry Pi opens up incredible potential. You do need a creative and careful strategy to make sure all the pieces fit together. To start, here are the basics of what you’ll need to get Windows installed and functioning on your Raspberry Pi.
After that, we’ll walk you through the overall preparation and installation process in detail, step by step.
Requirements for Windows Installation
You'll need a few key components for a successful Windows installation on your Raspberry Pi:
- Opt for either the 4GB or 8GB RAM model for better performance.
- Ensure it's at least 32GB to accommodate the Windows system files.
- WoR Installer and Windows ARM Image: These are crucial for initiating the installation process.
- A keyboard and mouse are necessary for setup.
Each element is an important piece of the puzzle. This is particularly critical since the ARM64 version of Windows is rife with menus and settings that need to be directly and delicately manipulated.
Of course, with Windows 11 ARM still being a pre-release, so be ready for a few bumps in the road.
Preparing Raspberry Pi for Windows
The preparation phase is extremely important so you don’t run into issues when it’s time to install Windows. First of all, make sure that your Raspberry Pi has a stable power supply so that there are no interruptions during the whole process.
A reliable and fast internet connection is essential here as well, and is required for downloading the special Windows files and subsequent updates. First, download the official Windows 11 ARM 64 pre-release from Microsoft’s website.
In order to do so, you will have to register for the Windows Insider Program. Then, let the WoR Installer flash the Windows ARM Image to your Micro SD card or SSD. This step is important as it sets your Raspberry Pi up for the Windows environment.
Installation Process Overview
The installation process is complicated; it truly is a daunting process. First, you’ll want to get the Raspberry Pi booted up. Next, you choose your storage drives, which are a MicroSD card and a USB drive.
For the rest of the time, an average user will wait 90% of the time for the RPi5 firmware to initialize before proceeding. It is important to follow each step in order carefully. Take your time with the installation!
A major issue can arise if you skip steps, such as 32-bit or 64-bit applications being incompatible with ARM-based systems. Despite these challenges, many popular apps, like Steam, VLC, and Spotify, function well on Windows 11 ARM for Raspberry Pi 5.
Remember, though, that the ARM version is still a pre-release. That doesn’t mean all features are fully functional at this point. By taking the right steps, you can reap the rewards of using Windows on your Raspberry Pi.
Consider all the little things to create an unforgettable experience!
Steps to Install Windows 10 on Raspberry Pi

1. Update Raspberry Pi Firmware
Updating the firmware is step 8, and it’s really important to ensure Windows 10 runs smoothly on Raspberry Pi. New firmware makes for better compatibility and performance, so you don’t have to worry about things going suddenly haywire.
Begin by launching the terminal application on your Raspberry Pi. Enter sudo apt update, then sudo apt full-upgrade. This will ensure all packages are up-to-date and all firmware is up to date.
Note that running very outdated firmware may cause compatibility issues. For example, hardware may not work properly, or the whole system may be unstable.
2. Gather Necessary Installation Tools
It's essential to have all the required tools at hand:
- WoR Installer: A vital tool for installing Windows on Raspberry Pi.
- Windows ARM Image: Specifically designed for ARM architecture.
- USB Keyboard and Mouse: This is for interaction during installation.
- HDMI Monitor: Displays the installation process.
You’ll need a PC running Windows 10 and a microSD card reader. Have an external Raspberry Pi 5v Micro USB power supply handy.
It needs to be able to deliver at least 1.0A of current to guarantee a stable power delivery.
3. Create a Windows 10 Image File
This is done by using UUPDump to download the ARM version. This new tool gives users the option to choose the most recent stable build, reducing bugs to a greater extent.
Once your image is created, you will need to stage it using IoTCoreImageHelper.exe. This step makes sure the image is ready to be flashed and is compatible with the Raspberry Pi’s architecture.
4. Flash Image to SD Card
Flashing the image to the SD card is a very careful procedure. Now, use a tool such as balenaEtcher to choose the Windows image you just downloaded and extracted and target the SD card.
If using a microSD card, make sure it’s formatted to FAT32 or exFAT to ensure the Raspberry Pi can read it properly. Common mistakes when flashing, like wrong formatting or a corrupted image file, can freeze the installation process.
5. Complete Windows 10 Installation
Now that your image is on the SD card insert it into the Raspberry Pi and turn the power on. The initial configuration process will start by asking you to select your language and country.
This is important for the system locale. Boot times are significantly longer than standard Raspberry Pi OS, coming in at around 2 minutes 12 seconds.
After installation, the system is surprisingly zippy, and installing software is a familiar Windows 10 experience. Programs such as GIMP Photo Editor, Arduino IDE, and Python 3.8 all ran smoothly and easily installed.
Steps to Install Windows 11 on Raspberry Pi
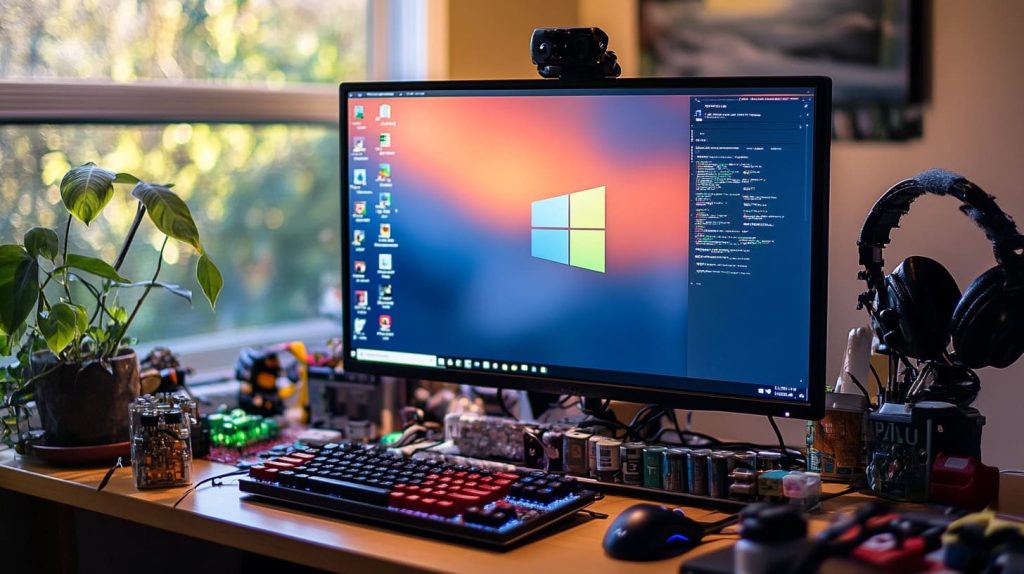
The journey of installing Windows 11 on a Raspberry Pi is a truly captivating experience, seamlessly merging creativity with functionality. It really unlocks a whole new world for anyone interested in seeing what this amazing little computing marvel can do.
Follow along as I take you step by step through the process of getting Windows 11 installed on a Raspberry Pi. With these tips combined, we’ll make sure you have a productive, fulfilling time!
1. Verify Compatibility with Raspberry Pi
Before getting into the nitty-gritty of the installation, it is important to ensure your Raspberry Pi model is capable of supporting Windows 11. Out of all the Raspberry Pi boards, the Raspberry Pi 4 would be your best bet, considering its superior hardware specs.
The only prerequisites are at least 4GB, though 8GB is better for smoother performance. Performance using an external SSD through a USB 3 caddy with USB boot enabled runs everything noticeably faster.
Note that the Pi’s onboard Wi-Fi, Bluetooth, and GPIO will not function. You will need to use Ethernet or plug in a USB Wi-Fi dongle instead. Keeping these specs in mind will set you up for a smooth installation.
2. Download Required Software
To install Windows 11 on Raspberry Pi, you first need to prepare the installation environment by downloading the required software tools. Here's a quick list to help you get started:
- This tool, developed by the WoR community, simplifies the installation process directly on the Raspberry Pi 4.
- An essential image file designed for ARM architecture, compatible with Raspberry Pi.
- A keyboard and mouse will facilitate the setup process.
WoR-Flasher (Windows on Raspberry Flasher) simplifies and automates almost the entire installation process. It downloads and flashes the Windows image to your SD card or SSD, automatically simplifying the installation process so it’s easier and less complicated than a manual installation.
3. Configure Installation Settings
This is an important step that’s easy to skip. First, it is important to note that the settings you select can significantly impact performance and usability. Overclocking the Raspberry Pi makes it run even faster.
It also increases heat production, so adequate cooling is absolutely necessary to ensure that temperatures stay below 176°F and prevent thermal throttling. Tweaking display settings and making sure that all-important drivers are loaded up can go a long way toward a better out-of-the-box experience as well.
4. Execute Installation Process
The execution phase consists of a number of distinct steps, each one crucial to success. The process, while a bit more tedious than installing through a native Windows PC, is much simpler.
With the WoR Installer, you simply follow the prompts, but precision is key. It will take 1-2 hours of installation, depending on your internet speed.
If you’re having problems, go back to the power supply connection first. Additionally, double-check that the SSD is in the right format and that it’s firmly connected. Fear not. With a little time and care, you’ll find Windows 11 waiting to be discovered.
Performance and Usability of Windows on Raspberry Pi

Running Windows on a Raspberry Pi computer sounds like a dream come true for anyone who loves to tinker with new arm64 technology.
Performance and Usability
Let’s dig into the performance. You’ll soon find that there are a lot of detailed expectations to be aware of. The Raspberry Pi 3B comes with 1GB RAM and a 1.2-GHz quad-core Arm Cortex A-53 CPU. It often fails to keep up with what Windows 10 requires. Booting the system is closer to four or five minutes.
Once it’s up, a click on the Start Menu can leave you hanging for another 10 to 20 seconds. This lag is indicative of the constrained CPU and memory, particularly when using demanding applications.
Assessing System Performance
To really understand performance, you can use the following metrics:
- Takes about four to five minutes to reach the desktop.
- Slow, with noticeable delays, especially for win32 apps like Chrome.
- Can be sluggish, affecting basic tasks like opening the Start Menu.
- Resource usage (CPU/RAM): Strained, given the limited 1GB RAM and basic CPU.
Tasks that are best handled on this setup are easy, low-impact tasks. Simple tasks such as text editing or controlling IoT devices are easily achieved.
Even relatively non-intensive things, like watching YouTube or using feature-heavy browsers like Chrome, become painful. Even the Edge browser (well, the Arm version anyway) can’t keep up with loading web pages, even though it's optimized for Arm.
Usability Challenges and Solutions
Real users quite regularly experience things such as the system becoming unresponsive and applications failing to open. When I streamed a 4K video on the Netflix app, it displayed stuttery performance.
The app completely crashed when I simply tried to resize the window. The Windows search box is another major sore point, with it sometimes not being able to locate the most basic of programs.
To address performance and usability impacts, stick with lightweight apps where possible, and turn off startup programs you don’t use to help with sluggishness and freezing.
The community forums are a wonderful source where users share experiences and solutions, providing great insights into optimizing their setups.
Optimizing Windows for Better Performance
Reducing Windows performance overhead on the Raspberry Pi requires adjusting a number of Windows settings. You can improve this by reducing visual effects and background apps.
Most importantly, regular updates are necessary to keep the system running well and securely. Use the tools at hand, such as Task Manager, to monitor and control your resource usage.
You can instantly kill those unneeded processes that are draining your limited CPU and RAM resources. Going with a lighter browser, too, like Edge, does make the whole browsing experience better.
This is all the more true if you’re developing in a resource-constrained environment.
Conclusion
Once you start running Windows on your Raspberry Pi, the possibilities will be endless. It won’t win any races against your desktop, but it offers a special combination of affordable computing and versatility. You get the fun of experimenting and finding out just how far you can push a $35 machine. It’s like your own personal tech playground. Regardless of whether you jump into Windows 10 or Windows 11, you get tangible experience that builds out your skillset. That’s it for now, so get out there and get your Raspberry Pi messing about. Visit our blog for more tips and tricks on getting the most out of your devices. Become a part of our vibrant community of makers and developers, and help us continue to explore new frontiers with Raspberry Pi.
Frequently Asked Questions
Can a Raspberry Pi run Windows?
A Raspberry Pi computer can run an ARM64 version of Windows, requiring special releases like Windows 10 IoT Core or a custom Windows 11.
What do I need to install Windows on a Raspberry Pi?
To get started with the Raspberry Pi computer, you’ll need a Raspberry Pi 4 or 400, a microSD card, a power supply, and an external monitor to run the arm64 version of Windows on Raspberry.


Leave A Comment