

As you know, more than 30 million Raspberry Pi devices are sold globally. Connecting a Raspberry Pi to your laptop via ethernet is a game changer for projects and learning. It opens up a world of possibilities, from coding on a Raspberry Pi desktop to robotics using a laptop display. This guide will show you how to easily set up your Raspberry Pi desktop on your laptop display. You’ll discover the tools needed and simple steps to get you started. Whether you're a beginner or an expert, this connection can enhance your skills and creativity. Let’s jump in and make your tech experience even better!
Key Takeaways
-
Start by properly preparing your Raspberry Pi, ensuring it has the right operating system and is powered up. This step sets the foundation for a smooth connection.
-
Connect your Raspberry Pi to your laptop using SSH (Secure Shell). This method allows you to access the Pi remotely, making it easy to manage without needing a separate monitor.
-
Set up VNC (Virtual Network Computing) if you prefer a graphical interface. This lets you control your Raspberry Pi’s desktop from your laptop, which is great for visual tasks.
-
Connect your laptop's screen and keyboard to your Raspberry Pi. This setup can save space and make it easier to work on projects directly.
-
If you want to share internet access, use an Ethernet cable between your laptop and Raspberry Pi. This can provide a stable internet connection for your projects without relying on Wi-Fi.
-
Remember that each of these steps is important for maximizing the potential of your Raspberry Pi. Following these tips will help you create a more efficient working environment.
Prepare Raspberry Pi
Install OS on SD Card
Download the Raspberry Pi Operating System if it is not already on your SD card. You can find the operating system on the official Raspberry Pi website. Use imaging software like Balena Etcher or Raspberry Pi Imager to write the OS image onto the SD card. Make sure the SD card is properly formatted before you start. This step is crucial for a smooth installation.
Configure Wi-Fi on SD Card
Create a file named wpa_supplicant.conf in the SD card's/boot directory. This file helps your Raspberry Pi connect to Wi-Fi. Input your Wi-Fi network's SSID and password into this configuration file. Remember, correct details are important for connection. Also, add an empty SSH file in the /boot folder. This allows remote access, which makes it easier to control your Raspberry Pi from your laptop.
Power On Raspberry Pi
Insert the prepared SD card back into the Raspberry Pi. Next, connect the power supply to turn it on. Watch as your Raspberry Pi boots up completely. It may take a few moments, but you will soon see the desktop interface if everything is done correctly.
Connect via SSH
Find Pi IP Address
Use the command arp -a in your terminal. This command lists all devices connected to your network. Look for the Raspberry Pi's IP address in this list. It usually appears with a name that hints it's a Raspberry Pi. Note down this IP address. You will need it for the SSH connection later.
Configure PuTTY for SSH
Download and install PuTTY on your laptop. It's a simple tool that helps you connect via SSH. Open PuTTY after installation. In the Host Name field, enter the Raspberry Pi's IP address you found earlier. Make sure to set the connection type to SSH. This step is essential to establish a secure link to your Raspberry Pi.
Access Pi with SSH
Launch the SSH session in PuTTY by clicking "Open." A terminal window will pop up asking for your login details. Enter the default username, which is "pi." Next, provide the default password, "raspberry." After entering these details, you should gain access to your Raspberry Pi.
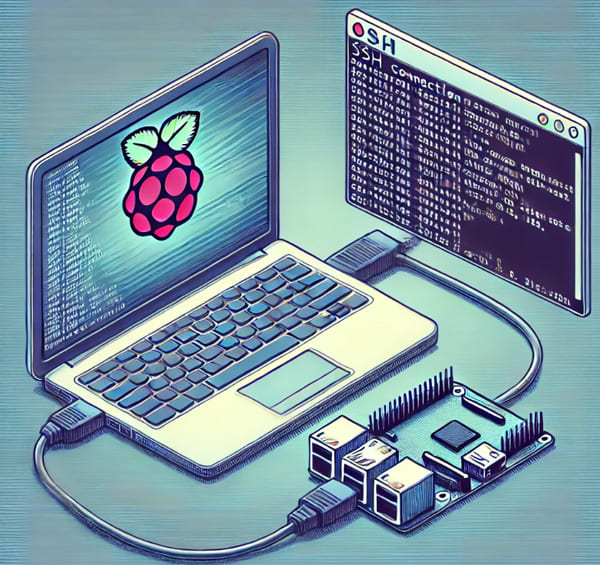
This process allows you to easily manage your Raspberry Pi from your laptop. Using SSH means you can work on your projects without needing a separate monitor or keyboard for the Pi.
Set Up VNC
Install VNC Server on Pi
Open the terminal on your Raspberry Pi. Type in the command to install the RealVNC server. This software allows you to control your Pi from your laptop. After running the command, wait for the installation to finish. Check for any messages that confirm the installation was successful.
Configure VNC Server
Use the command sudo raspi-config to access the Raspberry Pi configuration tool. Look for the option labeled VNC and enable it. This step is important because it makes your Pi ready for remote connections. Once enabled, check if the VNC server is running. You should see a confirmation that it's active.
Install VNC Viewer on Laptop
Download VNC Viewer on your laptop. This application will let you connect to your Raspberry Pi. After installing, open VNC Viewer. You’ll need to enter your Raspberry Pi's IP address soon, so make sure you have this information handy.
Connect to Pi via VNC
Type the Raspberry Pi's IP address into VNC Viewer to start the connection process. To log in, use "pi" as the username and "raspberry" as the password. These are the default credentials for many setups. Once entered, confirm the connection. You should now see your Raspberry Pi desktop right on your laptop.

Use Laptop Screen and Keyboard
Connect Screen via HDMI
Locate the HDMI port on both your Raspberry Pi and laptop. Most laptops have HDMI inputs, but some may not. Connect the two devices with an HDMI cable if your laptop supports it. Power on your laptop display. You should see the Raspberry Pi interface appear on your screen. This method enables you to use your laptop as a monitor for your pocket-sized PC.
Connect Keyboard via USB
Next, plug a USB keyboard into one of the Raspberry Pi's USB ports. The device should automatically recognize the keyboard when it boots up. This step is crucial because it allows you to enter commands and navigate through the Raspberry Pi's graphical user interface (GUI). A keyboard makes it easier to perform tasks and run programs.
Configure Display Settings
After connecting, access the Raspberry Pi settings. Adjust the display resolution and orientation if necessary. Choose a resolution that matches your laptop's display for better clarity. Saving these changes ensures that your setup runs smoothly every time you boot up. Proper configuration can enhance your experience while using the Raspberry Pi with your laptop.

Connecting your Raspberry Pi to the internet through an Ethernet cable is reliable. It often provides a stable connection compared to Wi-Fi.
Connect Ethernet Cable
First, insert one end of the Ethernet cable into the Raspberry Pi's Ethernet port. Then, connect the other end to your router or network switch. Look for LED lights on the Ethernet port. These lights show you have a stable connection.
Configure Network Sharing
Next, you need to set up network-sharing options in the Raspberry Pi settings. This step allows your laptop to access files easily. Enable file-sharing protocols like Samba. This makes it simple for your laptop to see and use files on the Raspberry Pi. If needed, adjust firewall settings to allow network traffic. This ensures smooth communication between devices.
Test Internet Connection
Now, it's time to test if everything works. Open a web browser on the Raspberry Pi. Try visiting a website to check if you have internet access. You can also ping an external website to see if it responds. If there are any issues with the internet connection, troubleshoot them promptly. Recheck all connections and settings.

Pensamientos Finales
Connecting your Raspberry Pi to a laptop is a game-changer. You can control it, share the internet, and use your laptop's screen and keyboard. It’s all about making your tech life easier.
Now that you know how to do it, why not try? Experiment with your setup and see what cool projects you can create. Don’t just stop here—dive deeper into the Raspberry Pi world! Explore new software or build something unique. Your creativity is the limit.
Frequently Asked Questions
How do I prepare my Raspberry Pi to connect to a laptop?
First, ensure your Raspberry Pi has Raspbian OS installed. Connect it to a monitor and keyboard initially for setup. Update the system using sudo apt-get update and sudo apt-get upgrade. Then, enable SSH through the Raspberry Pi configuration settings.
Can I connect my Raspberry Pi running the Raspbian operating system to a laptop without a monitor using a networking connection or a Mbps ethernet connection, and do I need to enter the wifi password?
Yes, you can use SSH to connect without a monitor. Before disconnecting the Raspberry Pi from the monitor, ensure SSH is enabled. Then, you can access it on your laptop using an SSH client like PuTTY.
What is VNC, and how do I set it up on my Raspberry Pi?
VNC (Virtual Network Computing) lets you remotely control your Raspberry Pi's desktop. Install a VNC server on your Raspberry Pi via the terminal. After that, install a VNC viewer on your laptop to connect using the Raspberry Pi’s IP address.
Can I use my laptop screen and keyboard via ethernet with my Raspberry Pi server?
Absolutely! You can utilize your laptop's screen and keyboard by setting up VNC or using a USB OTG cable. This setup provides convenience and saves space, making interacting with your Raspberry Pi easier.
You can share your laptop's internet connection by connecting both devices via Ethernet. On Windows, enable Internet Connection Sharing in the network settings. For Mac, go to Sharing settings and enable Internet sharing over Ethernet.
What should I do if I can't connect via SSH to the Raspberry Pi terminal or command line using ethernet or the Raspberry Pi desktop?
If you can't connect via SSH, check if SSH is enabled on your Raspberry Pi. Ensure both devices are on the same network. Also, verify that you use the correct IP address and port (the default is 22). Restarting both devices may help, too.
Is it safe to use VNC for remote access?
Using VNC can be safe if you take precautions. Always use strong passwords, and consider setting up a VPN for added security. Also, regularly update your software to protect against vulnerabilities that unauthorized users could exploit.


Leave A Comment