
Key Takeaways
-
Installing Pi-hole, a network-wide ad blocker, can turn Raspberry Pi into a powerful ad-blocking machine.
-
To set up a Raspberry Pi to block ads, start by downloading and installing the Pi-hole. It’s manageable via a very easy-to-use web interface.
-
To allow use over a network, you'll want to assign a static IP address to your Pi. This will then make it always the network's DNS server.
-
Pi-hole goes in-depth, allowing you to customize and manage blocked content extensively. You can even whitelist or blacklist specific domains with just a few clicks.
-
You can also expand ad blocking to other devices on your network, such as smartphones, tablets, and smart TVs. You simply configure these devices to use the Pi as their DNS server.
-
Highly advanced users can go further by getting into network configuration to enhance performance. They can even troubleshoot common problems, ensuring smooth ad-blocking on each connected device.
Have you ever considered using a Raspberry Pi for something other than coding recreationally?
Turn it into an ad-blocking machine!
Set up like a DNS server, kicking the ads off your network. You’re adjusting the settings on your devices, and boom — no more ads on your phone, tablet, or laptop.
Keep it running smoothly with simple maintenance tips.
Brace yourself for a reality where ads will no longer be able to annoy you.
Start this mini-tech adventure today!
See how a little bit of Pi adds up to making a huge difference online.
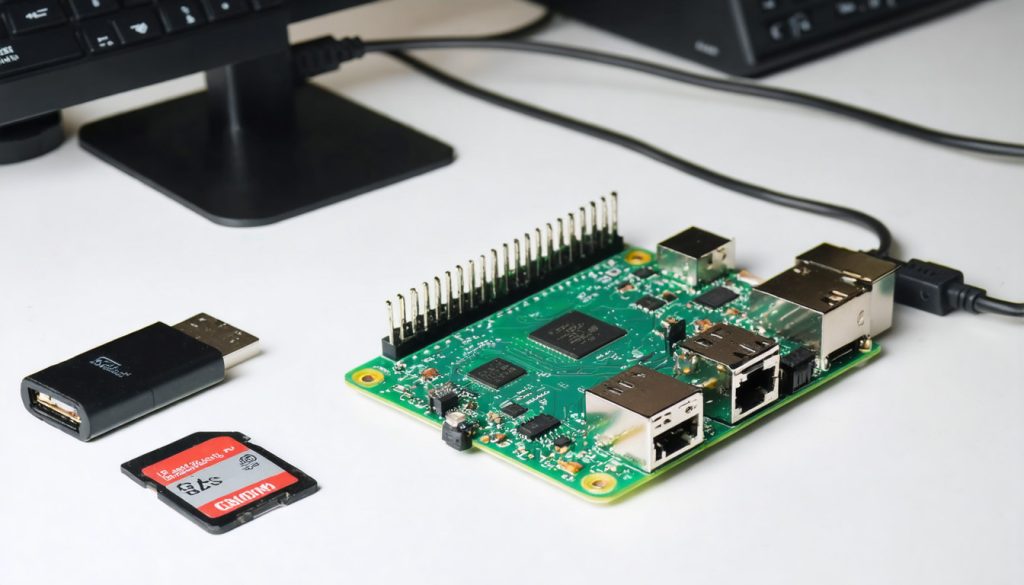
Understanding Raspberry Pi Ad Blocking
What is Pi-hole?
Pi-hole is this super-handy gizmo that runs on a Raspberry Pi, acting as a security gateway for your home network. It’s like a superhero for your network, swooping in to block ads across every device connected, including smartphones and tablets.
Think of it like a network-wide ad blocker. Unlike those traditional mobile ads blockers you might use on your browser, Pi-hole operates on a much grander scale, filtering DNS requests for your entire home network.
It works by filtering DNS requests. Whenever you try to visit a website, your device asks, “Hey, I want to visit this site.” That’s what the Domain Name System (DNS) does — it’s like a phone book for the internet, handling the requests for readable domain names.
Then, Pi-hole steps in and checks those requests against its blocklist of ad domains. When it sees a request to an ad domain, it blocks that request quickly. The ad, therefore, never shows up on your screen, making it an effective method to block ads on your entire network.
Pi-hole is open-source, which is super cool because it means anyone—yes, even you—can contribute to making it better. The community is constantly finding ways to enhance its features, including advanced privacy settings and custom DNS server options.
Another thing Pi-hole does exceptionally well is acting as a DNS sinkhole. Imagine a sinkhole in the ground that just gobbles up everything. Pi-hole does that, but with the advertising domains and trackers. It puts a halt to them dead in their tracks, keeping your data and privacy safe.
By using Pi-hole, you not only improve your home internet speed but also enjoy a more secure and ad-free browsing experience across your whole router. This interesting tech project is a fantastic way to take control of your internet usage and safeguard your private information.
Functionality of Pi-hole
Now, let’s talk about how Pi-hole works its magic.
Once it's set up, Pi-hole intercepts DNS queries from all your devices. It’s like a bouncer at a club, deciding who gets in and who doesn’t.
When your device makes a DNS request, Pi-hole checks it against its block lists. These lists are like the blacklist of domains known to serve ads.
If a domain is on the list, Pi-hole stops it right there, preventing the ad from loading.
Pi-hole’s web interface is very easy to use. It allows you to manage everything and keep an eye on it all.
You can see stats about how many ads were blocked. You can see what devices are making the most requests and what domains are getting blocked the most.
It’s sort of like having a dashboard for your network health.
You can get even more in-depth by configuring what it’s blocking or allowing.
Now, you have 100% control over your network!
How Raspberry Pi Blocks Ads
How does a Raspberry Pi become an ad-blocking machine?
It starts by acting as a DNS server for your network. When you set it up, configure your router to give Pi-hole's IP address as the first DNS server.
Doing this ensures all connected devices use Pi-hole for DNS resolution. Be it your laptop or that smart fridge, every DNS lookup goes through Pi-hole.
This setup is important because if your secondary DNS isn’t a Pi-hole, ads will slip through like nothing’s changed.
There are some nice things about using a Raspberry Pi for ad blocking.
First, it’s affordable. You're not paying for multiple ad blockers with subscriptions.
It’s efficient! By preventing those annoying ads from loading, it makes your internet faster and your browsing experience cleaner.
You get a vastly improved user experience! No more irritating pop-ups and ads while you work or during your leisure time.
Privacy and Security
Privacy is a big deal these days, and Pi-hole helps in that department too by offering an effective method to block ads. By utilizing a custom DNS server, you're not only blocking ads but also filtering out those trackers that follow you around the web. This means your browsing habits aren’t shared with advertisers, keeping your online activities more private and secure.
Using a Raspberry Pi for this task is also secure because it’s under your control. You’re not subject to third-party apps that may have their own agendas, ensuring that your home network remains free from unwanted interference. Open a browser and head to your Pi-hole's IP address. If you see your Raspberry Pi’s IP address, you’re golden!
Your network now has a powerful ad-blocking tool with the ability to filter out advertising domains. It protects you and makes your online experience even better while maintaining the integrity of your private information. With the hole web interface, you can easily manage your settings and monitor DNS traffic.
Implementing Pi-hole on your local network is a good idea for enhancing your home internet connection. It allows you to blocklist unwanted ads across your entire home network, providing a seamless experience for all connected devices. This setup is especially beneficial for mobile devices, ensuring that mobile ads are kept at bay.
Moreover, by configuring your hole instance, you can create a centralized whitelist for certain websites that you trust. This feature adds an extra layer of customization to your ad-blocking experience, allowing for greater control over what content is accessible.
In conclusion, using Pi-hole not only improves your online privacy but also enhances your internet usage by eliminating intrusive advertisements. This interesting tech project is an easy way to take charge of your home network and enjoy a more secure browsing experience.
Setting Up Raspberry Pi for Ad Blocking
Gather Necessary Equipment
Let’s dive right into the basics that you will need in order to set this up.
First, you have to have a Raspberry Pi, preferably at least 512MB of RAM. This little device is going to be the heart of your ad-blocking setup.
You'll also need a microSD card with at least 2GB of free space to store the operating system. It doesn't hurt to have an extra microSD card, just in case something goes awry. Better safe than sorry, right?
You'll need the Raspberry Pi Imager to get your operating system onto that microSD card. It's super handy and makes the process a breeze.
PuTTY is essential if you’ll be connecting to your Raspberry Pi over SSH.
Trust me when I say these tools are your best friends in this setup journey.
Don't forget the peripherals.
A reliable power supply is essential to keep your Raspberry Pi chugging along.
A reliable internet connection is essential during the set-up process. Alternatively, using an Ethernet cable ensures a solid and stable connection.
You definitely don’t want to be fighting with Wi-Fi hiccups halfway through the process.
Install Operating System Without GUI
The next step is getting that operating system onto your Raspberry Pi. We’re going to start by downloading the Raspberry Pi OS.
Be careful to choose the version with no graphical user interface (GUI). Why? It is lighter, and you will be doing everything via command line anyway, so no need for the extra bloat.
Once you’ve downloaded the OS, get your Raspberry Pi Imager. Now it’s time to write the OS to your microSD card!
This tool makes it as easy as pie — pun intended!
Select the appropriate OS image and write it to the card. It’s simple, but while writing, be patient—it may take a few minutes.
Before you pop that microSD card into your Raspberry Pi, don’t forget to enable SSH. You can easily access the Pi remotely. This saves you from having to plug it into a monitor every time.
The good news is that enabling SSH is easy!
All you have to do is create a blank file called ssh in the root of the boot partition of your microSD card.
That's easy peasy.
Connect to Raspberry Pi via SSH
Okay, let’s get you connected to your Raspberry Pi using SSH. You'll use PuTTY for this (see Resources). It’s a nifty program that you can use to log onto your Pi from another computer.
First, you need to find your Raspberry Pi's hostname or IP address. If you're unsure where to look, check your router's connected devices list — it'll probably be there.
Once you've obtained the IP address, open PuTTY and paste it in the 'Host Name' box. Hit 'Open', and you'll be prompted to log in.
Enter the default username (often 'pi') and the default password ('raspberry').
Change this password ASAP. It’s a security thing, and you don’t want anyone else fiddling with your setup.
Once you change the password, you’re ready to dive in!
Enjoy working on your Raspberry Pi from the comfort of your main computer. It's sort of like magic, if there were fewer rabbits and more tech!
Set Up Pi-hole Software
Now for the fun part—installing Pi-hole! This software’s gonna be your ad-blocking superstar.
To get started, you'll run a simple one-liner script that installs Pi-hole. It's straightforward: just copy the command from the Pi-hole website and paste it into your SSH session.
Let it do its thing, and you'll be walked through a menu-based installation process.
During installation, you’ll have a few options to check off. You'll want to select the network interface that Pi-hole is going to use.
If you've got an Ethernet connection, use that. It's stable and reliable for constant use.
The next step is configuring your upstream DNS provider. This is where your Pi-hole will send requests it can't handle.
Select a reputable provider like Google or OpenDNS. They're speedy and dependable, which translates to less frustration while you surf.
Don’t forget, you’ll need to assign a static IP address to your Raspberry Pi. To do this, head to your router’s interface.
It's crucial to keep things running smoothly, as the Pi-hole requires a static address to work its magic.
Once everything's configured, you can access the Pi-hole admin panel by going to your Raspberry Pi's IP address in your browser. From there, you can adjust settings and view logs to see how many ads you're blocking.
It's quite satisfying, too!
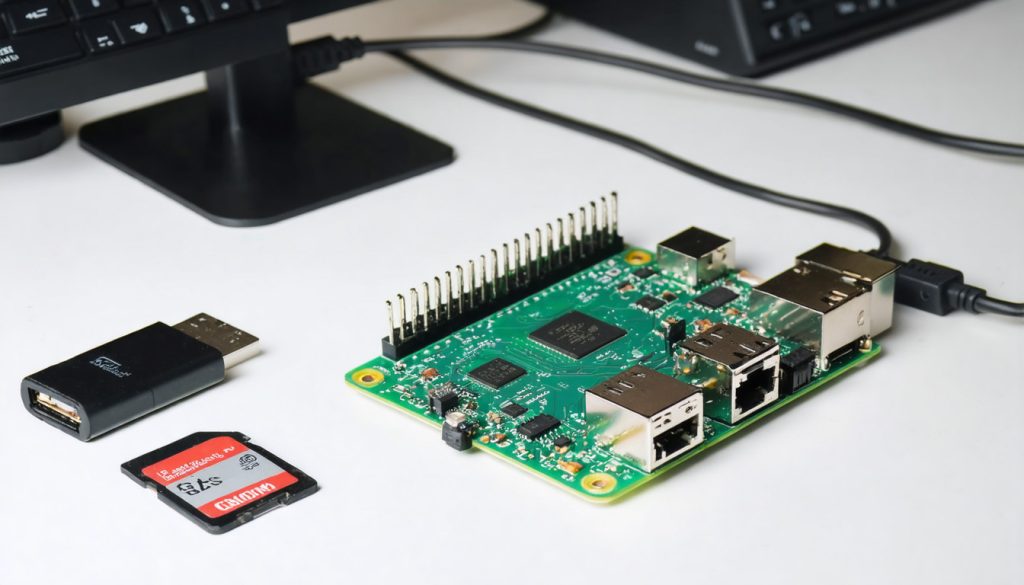
Configuring Raspberry Pi for Network Use
Adjust Device or Router Settings
First, let’s examine your router settings. You’ll need to log into your router using your computer or mobile device.
Usually, you can do this by typing something like 192.168.1.1 or 192.168.0.1 in your web browser. You may need to enter a username and password, which is usually printed on the back of the router.
Once you're in, look for the section that lets you change DNS settings. Here, you can configure your Raspberry Pi with Pi-hole as the primary DNS server.
When the Raspberry Pi is the main DNS server, it’ll be the one resolving domain names. Consequently, every device connected to your network relies on it to perform this task.
This is vital for blocking ads seamlessly across all your devices.
Don't forget to save your changes and restart the router to ensure everything takes effect.
Configuring the Pi-hole as the primary DNS server changes the way your devices access the internet.
Now, every device on your network will funnel its internet requests through the Raspberry Pi.
It’s kind of like giving your Raspberry Pi the opportunity to sift out those annoying ads before they even have a chance to get to your screens.
Just know that this will slow your network a bit (but it pays off for an ad-free experience).
Configure Static IP Address
Next, we’ll assign your Raspberry Pi a static IP. A static IP gives your Raspberry Pi a consistent address on your network, making it easy for other devices to find it.
Find your Raspberry Pi's MAC address first. You'll need this to assign a static IP. Open a terminal on your Raspberry Pi and type ip link show.
Go back to your router settings. Next, find the area for DHCP reservations or static IPs.
Then, append the Raspberry Pi’s MAC address and your desired IP address.
Ensure the static IP is outside your router's DHCP range to prevent any conflicts with other devices.
Make a note of this static IP somewhere secure. You could do a digital note or stick it on a sticky note at your desk.
This way, you can easily access your Raspberry Pi in the future. You’ll never have to hunt down its IP address again!
Change DNS Settings on Devices
Okay, now get your devices using the Raspberry Pi as their DNS server. The steps vary a bit depending on what device you’re using.
For Windows, go to your network settings, find the DNS section, and manually enter the Raspberry Pi’s IP address.
On a Mac, you’ll go to System Preferences, Network, and then adjust the DNS settings.
For mobile devices, it may require you to go to the Wi-Fi settings and manually enter the DNS server.
This process may seem a tad tedious. It's worth the trouble, though, because connecting your devices directly to the Pi-hole DNS server means that everyone can benefit from ad blocking.
Once you set this up, you may see a dramatic drop in ad inventory in your network.
It’s like your own little ad block party, and everybody can come.
It's a cool trick to make your browsing less cluttered and smoother.
Managing and Customizing Pi-hole
1. Whitelist Specific Sites
Okay, let’s talk about whitelisting.
You have your nice Pi-hole set up and it’s blocking ads like a pro. What if you want to support your favorite content creators by allowing ads on some sites? That’s where whitelisting comes in.
Pi-hole provides you with a web-based interface that you can access through your web browser. It's usually something like http://pi.hole/admin or http://<your.pi.ip.address>/admin.
Once you’re in, navigate over to the “Whitelist” section. Here you can add the domains of websites you want to allow ads from. Just enter the domain, hit Add, and bam! It’s on the whitelist.
Keep in mind, if you whitelist a domain, ads from that site will be allowed to come through.
It’s a balance—you get to support creators while still keeping the rest of your web experience ad-free.
If you’re adding too many domains, take a moment to review your selections. This will keep your ad blocking working for you.
It is also good to review your whitelist every once in a while. This way, only the sites you actually want to support are on it.
If you love tech blogs or news sites, then whitelist them. That way you can make sure their content keeps coming to you!
C’mon, who doesn’t love a good tech article, right?
2. Update Ad Block Lists Regularly
Why you should always refresh your block lists for effective mobile ad blocking. Pi-hole relies on these lists to know which advertising domains to block. If the lists are outdated, new ad domains may get through unnoticed, and your ad-blocking setup won't work as well.
To manually refresh your block lists, return to the admin interface. Under “Tools,” you will see an option that says “Update Gravity.” That updates your block lists and ensures you're protected from the latest ad domains on the planet, enhancing your overall internet usage experience.
Now, here's the cool part: you can also use custom block lists to enhance your ad filtering. There are many lists available, targeting various types of ads, trackers, and more. By adding these in, you adapt your Pi-hole to your specific needs, ensuring that your entire home network enjoys a seamless experience.
Just remember, the more current your lists are, the better your Pi-hole will perform. It’s like a performance-enhancing shot for your Raspberry Pi. I was able to achieve impressive speeds on my Raspberry Pi, solidifying its role as a security gateway for my home internet connection.
With the right configuration, your Pi-hole can function as a powerful tool for blocking unwanted ads across your local network. This method not only filters out mobile ads but also protects individual devices, making it a good idea for families or shared environments.
By keeping your block lists updated and utilizing advanced privacy features, you can ensure that your home network remains free from intrusive advertisements. This proactive approach not only boosts your home internet speed but also enhances the overall privacy levels of your network.
I was able to get a blistering 1.5 MB/s on my Raspberry Pi. That's solid performance for a home-run anti-ad solution that leaves your network running free of bloat.
3. Use Pi-hole Teleporter
Next, let's discuss the Pi-hole Teleporter feature, which is essential for managing your **home network**. This nifty tool is all about backups and migrations, particularly useful for users who want to ensure their **Pi-hole configurations** are secure.
For example, let’s say you decide to move your Pi-hole to a new Raspberry Pi. You may also wish to back it up for safekeeping. Teleporter is your answer to that right there.
Go to the “Settings” tab in the **hole web interface**, and click on “Teleporter.” You'll be presented with options to export or import your settings, making it an easy way to manage your **dns sinkhole**.
It’s really that simple—export your settings to a file and store it somewhere safe on your computer. Then, when you're ready to import, just select the file, and Teleporter will do the rest, ensuring your **home internet connection** remains uninterrupted.
The beauty of Teleporter is in its simplicity.
It makes managing your Pi-hole configurations a breeze, especially if you’re moving to a new device.
If you’re like me, always tinkering with your tech, this feature is a lifesaver for maintaining a **general purpose network**.
It's just that added peace of mind that your Pi-hole setup is safe and sound.
With features like **custom dns server** settings, you can optimize your **dns traffic** for the entire network, ensuring all connected devices benefit from the ad-blocking capabilities.
This functionality is particularly valuable for users with multiple **mobile devices** and smart appliances, allowing for a more efficient management of **internet usage** across the board.
In conclusion, the Pi-hole Teleporter feature is an indispensable tool for anyone looking to enhance their **home networks** while keeping their configurations secure and easily manageable.
Blocking Ads on Various Devices
Block Ads on Windows
If you're planning to block ads on your Windows device, you're in the right place. A Raspberry Pi can help you do just that!
First, let’s dive into the nuts and bolts of installing Pi-hole on your Windows machine.
Here's what you do:
-
Open Settings: Head over to the "Start" menu and click on the "Settings" cogwheel.
-
Click on "Network & Internet," then find "Change adapter options.
-
Select your network: Right-click on your active network connection (either Wi-Fi or Ethernet) and select "Properties.
-
Choose IPv4: In the list, find "Internet Protocol Version 4 (TCP/IPv4)" and click "Properties.
-
Use the following DNS server addresses: Check this option and enter the IP address of your Raspberry Pi running Pi-hole.
You’ll agree to faster page loads and a less cluttered experience with those pesky ads disappearing.
Pi-hole aims at various types of typical ads, from banners to popups, making your browsing experience smoother and more enjoyable.
To make sure everything is working, go to an ad-heavy site. Check to see if the ads have vanished!
Or, open a command prompt and type nslookup pi. hole. If it points back to your Pi’s IP, you’re golden.
Block Ads on iOS Devices
For iOS, blocking ads on your iPhone or iPad with Pi-hole is incredibly simple. Remember a few key pointers as well.
Here's your step-by-step guide to get started:
-
Open settings: Tap on "Settings" and go to "Wi-Fi.
-
Tap the "i" next to your connected network.
-
Tap "Configure DNS," switch to "Manual," and add the Raspberry Pi’s IP address.
Now, iOS can be a little bit tricky because it is a closed system in a lot of ways.
The Pi-hole excels at filtering out unwanted content directly at the network level. As a result, you’ll get fewer interruptions when you’re using your favorite apps or browsing the web.
To make sure everything’s all right, peek at a couple of ad-heavy sites. If they’re ad-free, you’re good to go!
Using Pi-hole on iOS cleans up your web experience. It also accelerates things by blocking those data-heavy ads.
Block Ads on Android Devices
For our Android users, setting up Pi-hole is equally simple and provides an easy way to block ads on mobile devices. Here's how to do it: Blocking ads on Android not only saves data but also enhances your browsing experience by filtering out unwanted advertisements. If you run into issues, try restarting your device to ensure the changes stick.
-
Open Settings: Navigate to "Settings," then "Network & Internet."
-
Under Wi-Fi, tap "Advanced" or "Network settings.
-
Edit Network: Tap your connected network, then "Modify network."
-
Set Static IP: Choose "IP settings" and switch to "Static.
-
Enter the Raspberry Pi's IP in the DNS fields.
Pi-hole is particularly effective at reducing mobile ad traffic, helping your Android device feel faster and more responsive. This method of mobile ad blocking is like giving your phone a little boost without any additional charge.
By using Pi-hole, you can create a custom DNS server that filters ads across your entire home network, ensuring a cleaner internet experience for all connected devices. This is a great solution for anyone looking to improve their home internet speed while maintaining privacy and security.
Additionally, Pi-hole can be set up to work seamlessly with your gateway router, allowing for easy management of your blocklists and whitelist sites directly from the hole web interface. This centralized approach makes it simple to control the ads that are filtered out across all devices connected to your local network.
Overall, using Pi-hole not only enhances your browsing experience on your Android phone but also serves as an interesting tech project for those looking to optimize their home internet connection. With its advanced privacy features and ease of use, it's definitely a good idea for anyone wanting to take control of their internet usage.
Advanced Network Configuration
Use DHCP to Block Mobile Ads
Let’s get into using DHCP with Pi-hole.
First off, DHCP is the post office of your network. It's what hands out IP addresses, the street addresses of your devices.
Now, why would we want to use Pi-hole as our DHCP server?
Simple! It provides you with the power to make ad blocking seamless on mobile. When Pi-hole does the job, it makes sure each device gets the right settings to block those pesky ads.
To set up Pi-hole as a DHCP server, jump into the Pi-hole admin panel. You'll see an option for DHCP settings. Enable it, and Pi-hole assumes that role of assigning IP addresses.
Remember, for this to work well, you need your Raspberry Pi’s MAC address. This hardware ID is unique, similar to a fingerprint. It helps your router know which device is which.
When using DHCP with Pi-hole, the effect on network performance is mostly a positive one.
Pi-hole filters out ads, so your browsing experience is faster. Plus, your mobile devices save data not loading those ads.
It’s kind of like getting an instant enhancement for your network.
You can easily assign a static IP to your Raspberry Pi using its MAC address. This will turn that current dynamic address into a permanent one.
This keeps everything stable and somewhat predictable.
Replace Router’s DHCP with Pi-hole
For ditching your router's DHCP in favor of Pi-hole's. That may sound a bit tricky, but it’s a game changer.
By centralizing DHCP management with Pi-hole, you give yourself a uniform ad blocking experience across each device.
Most routers, about 90%, don't allow you to specify your default DNS server. That’s where Pi-hole comes in; it needs to handle DNS queries to block ads.
First, disable DHCP on your router. This typically requires you to log into your router's admin page and locate the DHCP settings.
Once you do that, turn on the DHCP in the Pi-hole’s settings.
Make sure your Raspberry Pi is set up with a static IP. Use its MAC address so nothing can possibly change that may disrupt your setup.
If any device doesn’t get an IP, go back and check your settings.
Make sure that your Raspberry Pi's IP address is what you see in your network settings.
If you see your Raspberry Pi’s IP, great! Your setup works.
It’s important that each device receives the correct IP address so the network does not experience any hiccups.
Understanding network topology helps here too.
Understanding how your devices communicate with each other ensures that they play well with your Pi-hole.
With Pi-hole handling DHCP, you build a powerful system that prevents ads from tracking you and your network from slowing down.
Troubleshooting Common Issues
Resolve Ad Blocking Failures
If you're pulling your hair, wondering why ads still show up even after configuring Pi-hole, you're not alone. There are so many others in the same boat!
To diagnose the issue, we first need to see if Pi-hole is actually receiving the DNS queries from your devices.
Go into the Pi-hole admin dashboard and find the “Query Log.” If you see entries from your devices, those are good signs. If not, check your device's DNS settings to make sure they point to the Pi-hole's IP.
Conflicts with other ad blockers or VPNs can also muck things up.
If you’re using a VPN, pay attention to its DNS settings. Some VPNs route traffic through their own DNS, so this completely bypasses Pi-hole.
Similarly, browser-based ad blockers may conflict with the operation of Pi-hole. Disable other ad blockers to see if that changes anything.
Block lists are a Pi-hole's bread and butter. If ads are getting through, you may need to update your block lists.
Go to the Adlist tab in the Pi-hole dashboard and reload your block lists.
Remember, YouTube ads are tricky. YouTube's architecture causes it to serve ads from the same domains as its videos. This setup allows Pi-hole to not block the ads while not interrupting the video playback.
Fix Ads Getting Through
If you’re fighting ads that get through the cracks, don’t lose heart—there’s something you can do about it.
Start again with the “Query Log.” This time, you’re looking for domains that match ads. Once you identify these domains, add them manually to your block list.
To catch new ad domains, updating block lists regularly is crucial.
Make it a regular habit to refresh them weekly, so you’re prepared to combat the newest ad server trick.
Join community forums where people post current block lists and advice, keeping you one step ahead.
The Pi-hole community is a treasure trove of knowledge. When you’re stuck, don’t be afraid to ask.
Whether it’s forums or specialty subreddits, these sites are full of fans ready to help.
Handle Whitelisting Problems
The whitelisting can be a sword; it can be your savior and at the same time, it can be a real head-scratcher.
Most problems are due to typos or the wrong domain being selected. Always double-check the spelling and format before whitelisting a domain.
Conflicting entries can create headaches as well.
When a domain is both blocked and whitelisted, Pi-hole can behave erratically.
For overlap, review your whitelist and block lists side by side and work through conflicts.
If none of the above works double-check the domain. Sometimes, the ad you want to whitelist might be part of a larger domain umbrella.
The key is to research thoroughly so you’re whitelisting the right domain.
Generate Debug Information
Creating debug information is what you do when the problem won’t die.
You’ll need to bring up the Pi-hole admin interface and click “Generate Debug Info.” This will create a comprehensive log of Pi-hole's activity.
Debug logs are invaluable for diagnosing complex problems.
They also give you clues about what's going on behind the scenes so you can isolate specific errors or misconfigurations.
Once generated, share this information with the Pi-hole community.
If you post on forums or GitHub, include the debug token given. This allows veteran users to provide specific tips and solutions.
Debug logs aren't just for troubleshooting—they actually help optimize Pi-hole's performance.
By reviewing these logs, you can identify areas for improvement and ensure that your Pi-hole is running optimally.

Conclusion
So there you have it.
Now, you can block ads with Raspberry Pi. It's easy and saves time.
We've covered setting up the Pi, configuring it, and using Pi-hole to keep ads at bay. You adjust settings to meet your own needs.
Want more control? This is where you should dive into advanced settings.
Solving problems? You have tips for that, too.
Now, it’s time to take this knowledge and go do something with it.
Why wait?
Get your Raspberry Pi, follow the steps, and see the difference.
You’ll get a cleaner, faster browsing experience. No more annoying ads getting in the way.
Spread the word and help a friend out. Make the web a better place with me.
Grab your Pi and get started on this ad-free journey today.
Frequently Asked Questions
What is Raspberry Pi ad blocking?
Raspberry Pi ad blocking utilizes a Raspberry Pi device, specifically through Pi-hole software, to effectively block unwanted ads across your entire home network. This method enhances your browsing experience by reducing interruptions from mobile ads and accelerating page loads.
How do I set up Raspberry Pi for ad blocking?
Start by writing Raspbian on your Raspberry Pi. Hook it up to your home network. Download and install Pi-hole, a custom DNS server designed to block ads. Follow the setup instructions; Pi-hole guides you on configuring your Raspberry Pi as an effective ad blocker.
Can I block ads on all devices using Raspberry Pi?
Can I use Pi-hole on Raspberry Pi to block ads on my devices? It serves as a custom DNS server, filtering traffic at the network level and effectively blocking mobile ads on smartphones, tablets, computers, and smart TVs.
How do I customize ad blocking with Pi-hole?
Check Pi-hole’s dashboard to change settings and configurations for your home network. You can whitelist or blacklist domains, adjust the level of blocking, and monitor network usage, enabling personalized mobile ad-blocking preferences for your entire network.
What are common troubleshooting steps for Raspberry Pi ad blocking?
If blocking isn't working, check your network settings to ensure that your home network devices are using the Raspberry Pi's IP as their preferred DNS server. Confirm that Pi-hole is running and up-to-date for effective mobile ad blocking. If problems persist, restart your Raspberry Pi and networking devices.
Is advanced network configuration necessary for ad blocking?
Basic ad blocking doesn’t involve complex settings. However, incorporating features like a custom DNS server or utilizing mobile ad blocking can significantly enhance functionality and security.
Does Raspberry Pi ad blocking improve network performance?
Yes, blocking ads, especially through methods like mobile ad blocking, significantly improves network performance. It minimizes bandwidth usage and accelerates page load times, delivering a smoother internet experience for the entire home network.


Leave A Comment